Bought a TC4 FT

Welcome to RCTalk

Come join other RC enthusiasts! You'll be able to discuss, share and private message with other members of our community.

This site may earn a commission from merchant affiliate
links, including eBay, Amazon, and others.
I used a small paint brush with the bristles cut so they are only about 1/8" or less long. Worked perfectly without any mess.
 
Thanks guys! Thin CA is sometimes a pain to work with.... I can't tell you how many times I have glued my finger to something! That stuff runs quick! I will give the paint brush a try.

Tom
 
When it comes to sealing and gluing, I'm a big fan of epoxy and a toothpick. You can make epoxy any thickness you want. Get a little blob on the toothpick, transfer said blob to the edge you want to seal and run the edge of the toothpick along the edge you want to seal. No lint (like from q-tips) and the hard edge of the toothpick means you'll get a nice, smooth seal that fills in the holes without being thick. Works every time!

Edit: When it comes to epoxy, the longer the drying time, the more flex of the epoxy. Short drying stuff will be brittle. Not that you need that much flex for this application, but just a FYI.
 
Last edited:
Well, guys, I have started the build and there is quite a bit more binding than I had thought there would be. First off, when you turn the chassis upside down, should the A arms fall? I mean without the shocks attached of course. I have filed each side at least 5 or 6 times each and I am still binding. Also when I attached the caster blocks to the C hubs, I am getting alot of binding there as well. It is very tight between the c hub and those metal bushings that go into the caster block. Is this supposed to be this tight? Thanks guys.

Tom
 
The first part with the As should flop without any resistance. On the flip side there should be little to no play. Look, feel, look again, feel some more and decide where its binding.

The C hubs should be tight. The pivot comes from the metal insert being held in with the ball stud. It shouldn't flop but should turn with a little resistance.
 
Ok... I will check it out. The C hubs are really tight. I have to find a place to file a bit off I suppose. I have the screws just touching the surface no tighter. Another problem I am having is with the diffs. When you assemble the diffs the screws with the bearings go in one side and a t-nut in the other. Well I compressed the spring, put the t-nut in, and tightened up. I could not get the T-nut to pull in on either diff. I am not able to get the dogbone in the outdrive as a result. I tried to get it tighter but then the screw broke off. So I had to get another screw and t-nut, well needless to say I took it easy on this one and still I was not able to get it to seat all the way. I can take the diffs lock the outdrives and I get no slipping. Any advice guys? Thanks

Tom
 
I went back and looked at the build instructions, and it appears I have installed the T-Nuts properly... Did you guys have any problems with this?

Tom
 
There is a Long half and a Short half on the Diffs. Make sure you are not building them backwards. AE has been using the same design for years and I have never run into this issue.

On the c-hubs. Pull the ends over super fine sand paper laying flat on the bench. Just lightly draw each end over the paper. Once on both sides where it meats the hub carrier. Do this and "Fit" them. You may need to do it a few times to get it where you want it.

Will do my friend. I will double check my setup. I am not putting it past me to have installed these things backwards. LOL. Just for the record though... which side should recieve the T nut? I have heard that some folks have complained that the directions are setup in a way that assumes you have built a touring car before. Is there any truth to that? There are some parts that have been vague but I don't think they have left anything important out. Thanks for the info I will let you know. Thanks

Tom
 
Last edited:
Well Guys,

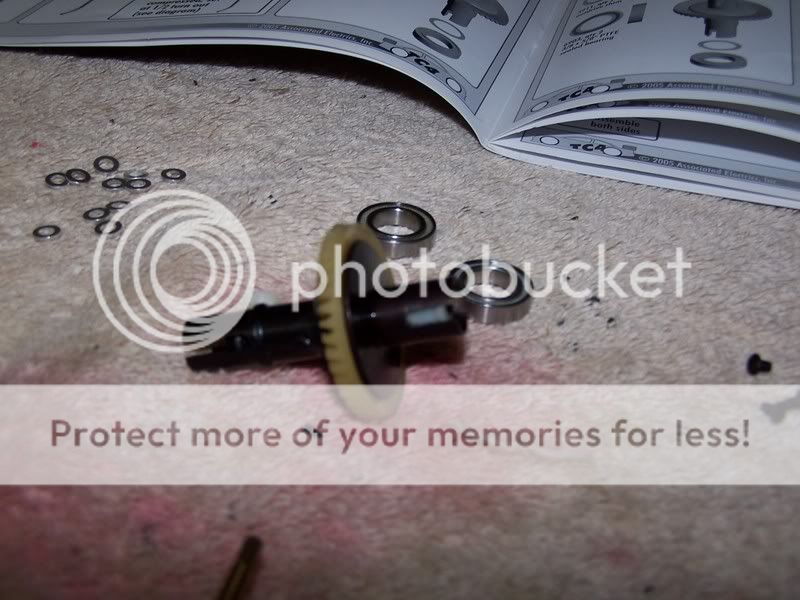
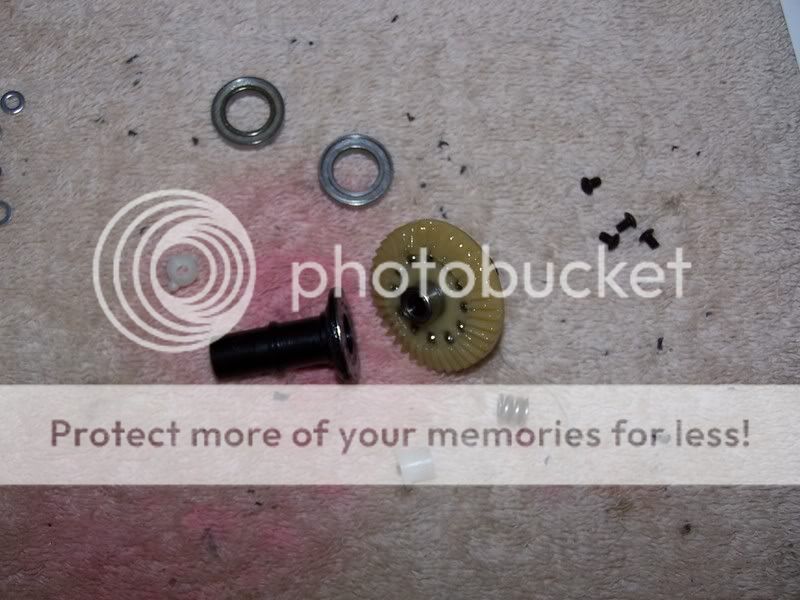
I am about to throw this damn car through the wall. I have checked and rechecked how to build this diff and I am doing it correctly. At least I am doing it as shown in the book. The T nut goes in the short side of the diff. The diff is tight I can't turn it with the two outdrives locked. I broke another screw this evening. That is number two so far. Once they are tight that is it. The t nut just won't pull up tight in the outdrive. I do not know what I am doing wrong here guys. Anyway here is a set of pictures. Hopefully it shows what I am doing wrong. I really need some help guys.

100_1816.jpg


100_1815-1.jpg


100_1814-1.jpg


100_1814-1.jpg
 
Are you using the proper screw. Its hard to see but by the looks its 2-3 times to long.

Are you building the METAL or PLASTIC diff?
Look on page 11 far upper right side of the page.
Depending on the diff you build them differently.
 
Here is how I do it. put an alen wrench that fits the dif bolt in a vice.
Put the screw on the end of the wrench.
Washer
Thrust bearings with black grease
Washer
(METAL) Short Diff half.
Lube (Clear) just a light wipe on the diff half
Bearing
Washer
Gear
Lube (clear) in each ball hole of the gear
Balls
Washer
Bearing
Long diff half With a light smear of clear grease
Spring inside the end of the long diff half
T-Nut with T part to the outside of the diff.

Spin the top Half to thread the bolt to the T-Nut.
If needed, Insert an Allen wrench crosswise through the slots of the dif across the top of the t-nut to hold pressure on it to start the thread.
Spin the top diff half till you feel the spring tension.
SLOWLY turn it till the spring is compressed then back it off 1/8th turn.
 
I am intalling the metal diffs. The same diffs that go into a TC3. I almost certain I am using the right screw. It is the long screw with threads only going about half way up. I will check to make sure I am using the right instructions. I will go back and check that page again. I am trying to take my time but it is very possible I am still missing the right setup. Thanks for the info FastEd. I really apreciate your help.

Tom
 
From the metal and plastic diff, the bolt length is different as well as the spring placement. If all else fails, build a plastic diff according to the directions and see how it comes out. From there look at the directions on page 11 and compare the bolt lengths as well as the spring placement and go from there.
 
Also make sure you are using the proper diff drive ring. The ring for the plastic diff has a D in the center and the one for the metal diff is round in the center.

In the TC4 FT Manual the Plastic diff directions are on page 4 and the metal is on page 5. An exploded view is on page 11 upper right top.
 
From the metal and plastic diff, the bolt length is different as well as the spring placement. If all else fails, build a plastic diff according to the directions and see how it comes out. From there look at the directions on page 11 and compare the bolt lengths as well as the spring placement and go from there.


Sounds like a plan. I will check out the two sets of instructions as well. All part of the learning process I suppose. I will let you know how it tuns out. Thanks my friend!

Tom
 
Last edited:
Sounds like a plan. I will check out the two sets of instructions as well. All part of the learning process I suppose. I will let you know how it tuns out. Thanks my friend!

Tom

Turns out I was building the damn things backwards!! Figured it was me all along! LOL I called associated and it turns out my manual is an older version even though I bought the kit NIB. I went to RC Documents and downloaded the newer more recent version that has all the correct info. Associated is also sending me out some new bolts and Tnuts free if charge. Oh well... chalk it up to experience I suppose.

Tom
 
Thats OK.
The other day I went to a track that was ROAR and needed to change motors to comply with the rules. In the first heat they set my car down for me as they do for everyone. The horn plows, I pull the trigger and guess what.........

I take off backwards at full speed. :D

LOL I dont even want to start in on all the backwards things I have done in this hobby.

LOL... well it makes me feel better to know that I am not alone. I have learned something, and am a better modeler now because of it.... :D

Now, if you will excuse me... I am off to start on my next mistake! LOL

Tom
 

Similar threads

Back
Top