Dhk Maximus upgrades

Welcome to RCTalk

Come join other RC enthusiasts! You'll be able to discuss, share and private message with other members of our community.

This site may earn a commission from merchant affiliate
links, including eBay, Amazon, and others.

Peteyk49

RC Newbie
Messages
12
Reaction score
14
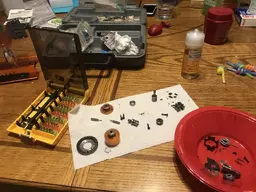
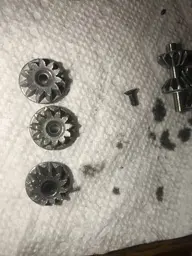
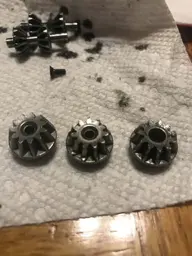
Hey there, I was wondering if anyone knows what are some of the best upgrades for the DHK Maximus. It’s coming in the mail in a few days and I have issues with leaving things stock. I’ve been reading a lot about the truck and haven’t really pinned down too many upgrades like tires, gear oil for the diffs., what gearing to run and where to buy them. A metal spur gear. Better suspension tuning etc... I ordered better batteries and a Servo... any tips would be gladly appreciated.
 
Mailman has some good posts about the truck here: https://www.rctalk.com/forum/threads/any-opinions-on-the-dhk-maximus.104407/

ignore his complaints in early posts about the bad electronics, they have since remedied the issue and your truck will come with the better hobbywing stuff ;) But he goes on to talk about upgrades later down the line and where to get parts for it as well.
 
Well so far my experience with the Maximus hasn’t been that great. The self tapping screws keep backing out on the a arms and shocks. I replaced some with screws and locknuts. I went back and put red lock tite on some of the screws that still backed out with blue lock Tite. I lost a screw the goes into the bottom of the front wheel hub. Had to make my own rig until my parts come. Then the teeth ripped off spur gear in the rear diff. So far I ran 2 sets of batteries thru it and had to order $200 in spare parts. I did order upgraded parts for the rear diff. It’s a nick rc truck but man does it fall apart. I’m not even rough on it
 
Well... a few sets of batteries later, I had to rebuild the rear diff. I turned up the punch to level 7 and ripped apart the spur gear. I upgraded hoping for a better tomorrow haha

64B8F408-0C49-4FC5-B8EC-960EFB48244B.jpeg
9DB08534-2BF6-407E-947D-D9697A3318E6.jpeg
 
I want to thank MailManX and JapanRCAdventures For their work and info. it has been a great help. For me, I ran a bunch of sets of batteries through my Maximus and haven't a problem yet with the screws, but I will keep an eye on it. I am incredibly happy with my Maximus. Anyhow, continuing on. T-Bone has some great Nylon bumpers and wheelie bar. I just wanted to share my pictures of my T-Bone install.

Starting with the rear bumper, 16010 - TBR XV4 Rear Bumper,, an amazing upgrade. It looks great. Comes with M3 and M2.5 fine thread screws that replace the stock course thread screws. It attaches at the bottom aluminum frame and where the stock bumper used to be. You can't run both the stock and the T-Bone in conjunction.


20190825_142530.jpg


For the front bumper, I bought both DHK basher bumpers. Below is the 16008 - TBR Basher Front Bumper - DHK Maximus. It mounts like the rear bumper and,,, again the T-Bone 16008 can not be used in conjunction with the stock bumper.

20190825_142927.jpg


I went with a different route as MailManX suggested in his original post, The 16000 - TBR 1/8 Basher Front Bumper - DHK Optimus XL provides more of a skid plate look and protection. As you can see below, you use the stock bumper in conjunction with the T-Bone 16000 Optimus XL. This bumper is made for the DHK Optimus XL. So in my case, there was a modification needed. I had to do is open the holes a little bigger to allow the proper screws and counter-sink the holes. Off memory, the screws I used are M3 fine thread and about 1mm longer than stock. It's a bad picture,, the T-Bone bumper/skip plate doesn't look off-center in person.


20190825_142604.jpg
 
I want to thank MailManX and JapanRCAdventures For their work and info. it has been a great help. For me, I ran a bunch of sets of batteries through my Maximus and haven't a problem yet with the screws, but I will keep an eye on it. I am incredibly happy with my Maximus. Anyhow, continuing on. T-Bone has some great Nylon bumpers and wheelie bar. I just wanted to share my pictures of my T-Bone install.

Starting with the rear bumper, 16010 - TBR XV4 Rear Bumper,, an amazing upgrade. It looks great. Comes with M3 and M2.5 fine thread screws that replace the stock course thread screws. It attaches at the bottom aluminum frame and where the stock bumper used to be. You can't run both the stock and the T-Bone in conjunction.


View attachment 119633


For the front bumper, I bought both DHK basher bumpers. Below is the 16008 - TBR Basher Front Bumper - DHK Maximus. It mounts like the rear bumper and,,, again the T-Bone 16008 can not be used in conjunction with the stock bumper.

View attachment 119634


I went with a different route as MailManX suggested in his original post, The 16000 - TBR 1/8 Basher Front Bumper - DHK Optimus XL provides more of a skid plate look and protection. As you can see below, you use the stock bumper in conjunction with the T-Bone 16000 Optimus XL. This bumper is made for the DHK Optimus XL. So in my case, there was a modification needed. I had to do is open the holes a little bigger to allow the proper screws and counter-sink the holes. Off memory, the screws I used are M3 fine thread and about 1mm longer than stock. It's a bad picture,, the T-Bone bumper/skip plate doesn't look off-center in person.


View attachment 119636
Nice. My son broke the rear bumper off my Maximus but I used longer screw with nuts to put it back on
 
Hi Peteyk49! how is the upgraded rear diff working out? Please tells us what worked for you, and if anything did not.
 
Hi Peteyk49! how is the upgraded rear diff working out? Please tells us what worked for you, and if anything did not.
Well.....it broke again. I thought I shimmed it correctly. It was nice and smooth. Everything meshed nicely. I kept all the original parts and put them in the new setup. I only replaced the pinion gear assembly since it’s teeth were chewed up. All the planetary gears and pinion gear looked to be in great shape. I cleaned everything up and replaced the diff. Fluid with 50k oil. I put 100k in the center diff and 50k in the front. I haven’t got a chance to tear into the rear diff yet. I have a screw that stripped out in the bottom of the bumper that attaches to the rear diff and hold a few other parts in place. I tried to epoxy an Allen key in the stripped out screw but had no luck. I ordered a new rear bumper and complete diff set. I’m just going to cut off the bumper with a dremel and get the screw out when my parts come in. I plan to turn the punch down from level seven and go back to level 5. It may be too much for the pinion gear. My batteries are power hobby 5200 mah 50c 100c burst 2s lipos that came with the truck from the vendor. I need to do the servo mod you did. I added the same servo but need to add a spacer to level things out
 
Well it’s all fixed again for now. I had a bunch of spare parts and was able to rebuild the rear diff. before my order came in. I added an extra shim to the planetary gears, spur gear and pinion gear. There seemed to be too much play between all the gears so hopefully I made the right choice by lessening it haha. We shall see. This was the third 11t pinion gear I’ve replaced in 6-7 runs. I just have to wait for the new stock bumper to mount everything up! From left to right and top to bottom is the new gear and the other two are stripped. My phone couldn’t take a good enough picture to see where the teeth got damaged. I’m turning my punch on the esc back to factory.
 

Attachments

  • DC37C296-C891-4C93-BFC5-15FE98BC461D.jpeg
    DC37C296-C891-4C93-BFC5-15FE98BC461D.jpeg
    409.3 KB · Views: 236
  • 219E865E-C709-4A6F-BA7C-B51D6CAC7944.jpeg
    219E865E-C709-4A6F-BA7C-B51D6CAC7944.jpeg
    298.2 KB · Views: 322
  • A8D78CA3-82BE-46FB-95B5-597CFE8E4C06.jpeg
    A8D78CA3-82BE-46FB-95B5-597CFE8E4C06.jpeg
    355.7 KB · Views: 286
  • 484F8D47-159E-4297-99C2-7F9B89BDCF50.jpeg
    484F8D47-159E-4297-99C2-7F9B89BDCF50.jpeg
    229.9 KB · Views: 265
Back
Top