
Finally it arrived !!!
What an illusion to see the box:
 Sin título by alberto espinosa, en Flickr
 Sin título by alberto espinosa, en Flickr
And I start to take out, first a pair of jellies for the V8, some pulleys and the ignition, they did not have more sweets in stock ...
 Sin título by alberto espinosa, en Flickr
Nothing else open, a little screw to the ground, we'll see if it is missing somewhere or it comes from more:
 Sin título by alberto espinosa, en Flickr
Wet does not come hehe :
 Sin título by alberto espinosa, en Flickr
The bags with details and paraphernalia vary :
 Sin título by alberto espinosa, en Flickr
Another bag with wall and battery charger NIMH:
 Sin título by alberto espinosa, en Flickr
And the transmiter , which comes prepared with the third channel for winch:
 Sin título by alberto espinosa, en Flickr
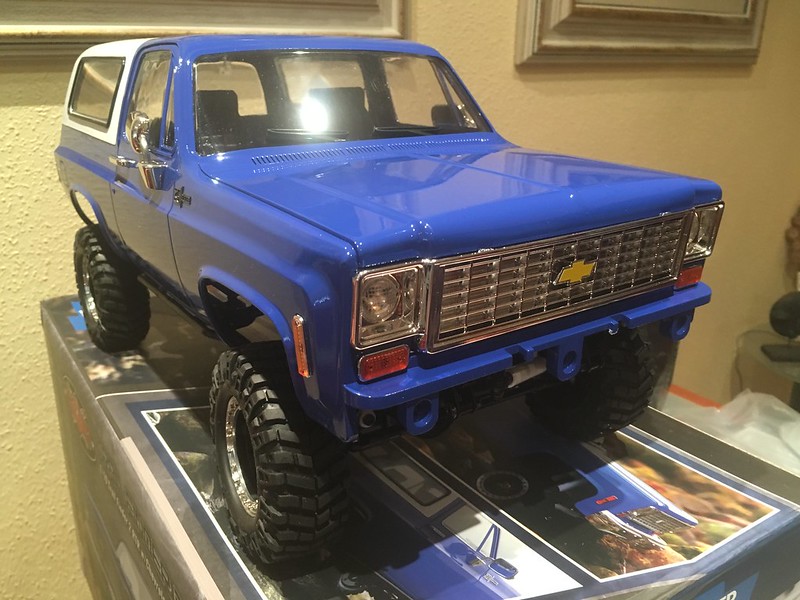
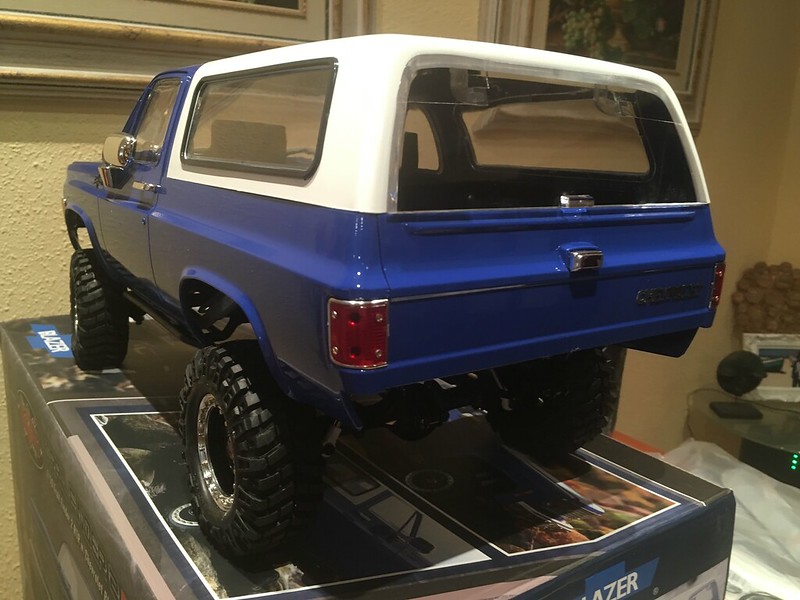
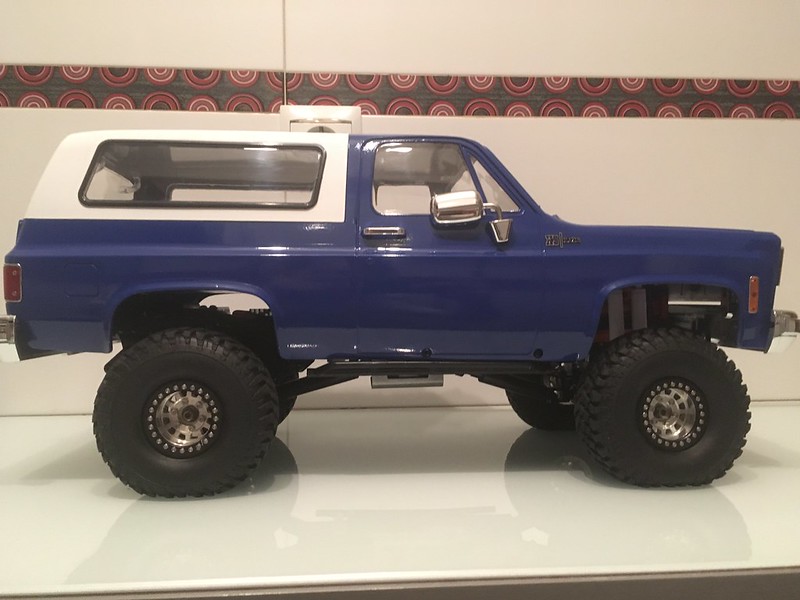
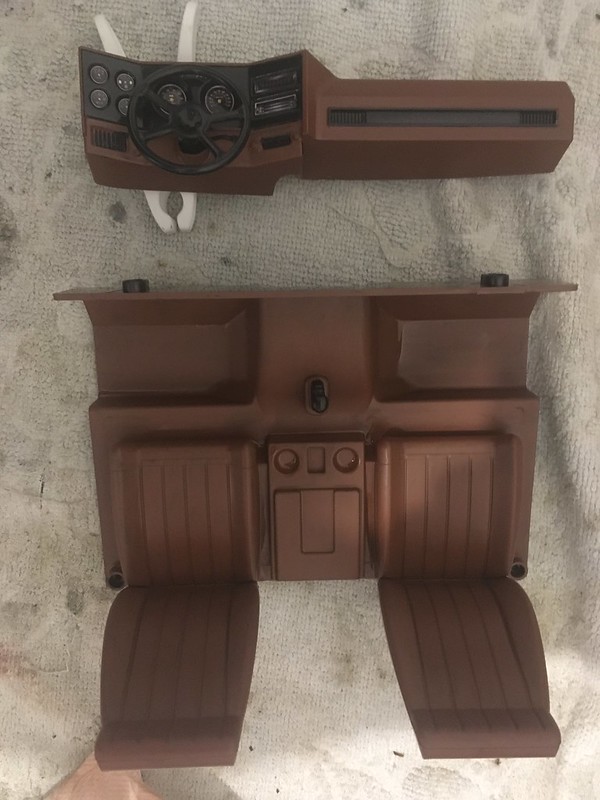
I take it out of the box, well protected comes for the compact that is the box and what it includes. First impression, and although I had seen the body live more times, not so the v8 and the r4, but more beautiful live than in the truth photo, used to buy cars, the truth that has surprised me pleasantly:
 Sin título by alberto espinosa, en Flickr
 Sin título by alberto espinosa, en Flickr
 Sin título by alberto espinosa, en Flickr
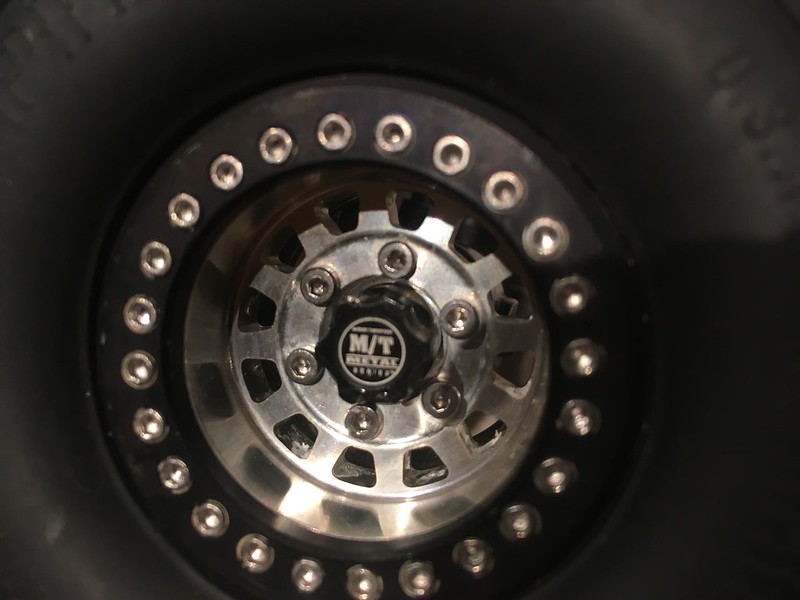
The wheels, precious the truth, the screws and elacabado with the front locks:
 Sin título by alberto espinosa, en Flickr
And the backs the different cap:
 Sin título by alberto espinosa, en Flickr
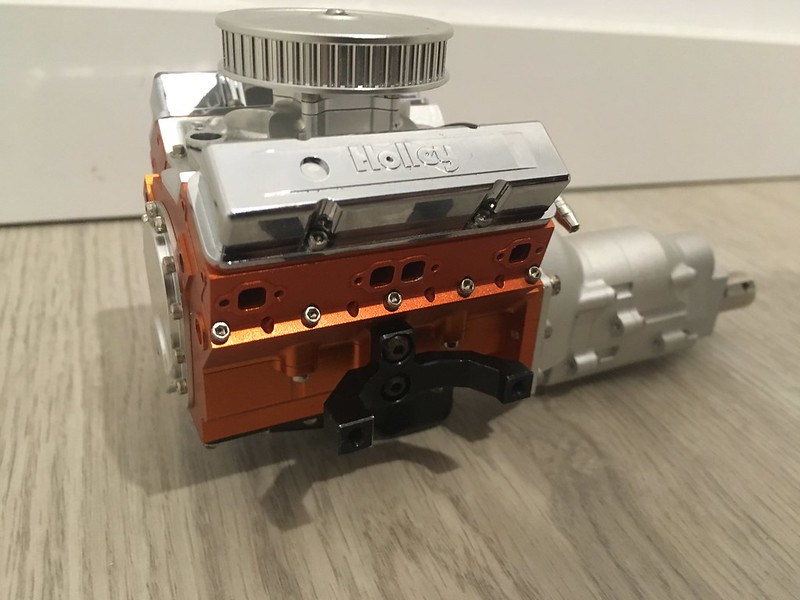
And what I most expected to see, the V8 with the R4 and the double front shock absorber, quality finishes and detail, impressed me I'm really jejeje, win live:
 Sin título by alberto espinosa, en Flickr
 Sin título by alberto espinosa, en Flickr
 Sin título by alberto espinosa, en Flickr
For the time being it's everything, it's a workshop, first to change the yota1 for some yota2 with ballistic caps and change wheels hehehe, then more things that I'll tell you.
Test the wheels:
 Sin título by alberto espinosa, en Flickr
 Sin título by alberto espinosa, en Flickr
 Sin título by alberto espinosa, en Flickr
And the axes that will lead to the wait:
 Sin título by alberto espinosa, en Flickr
I changed the fuel tank for one of alu in red from RC4WD:
 Sin título by alberto espinosa, en Flickr
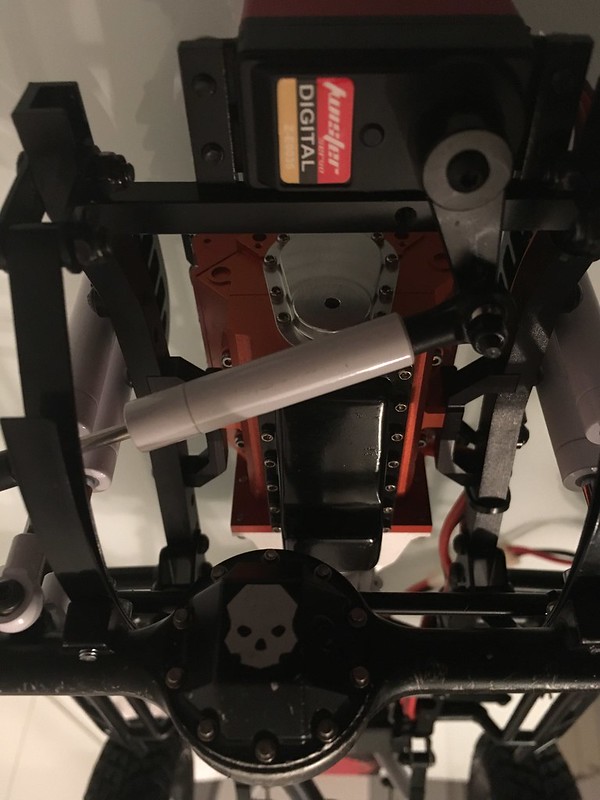
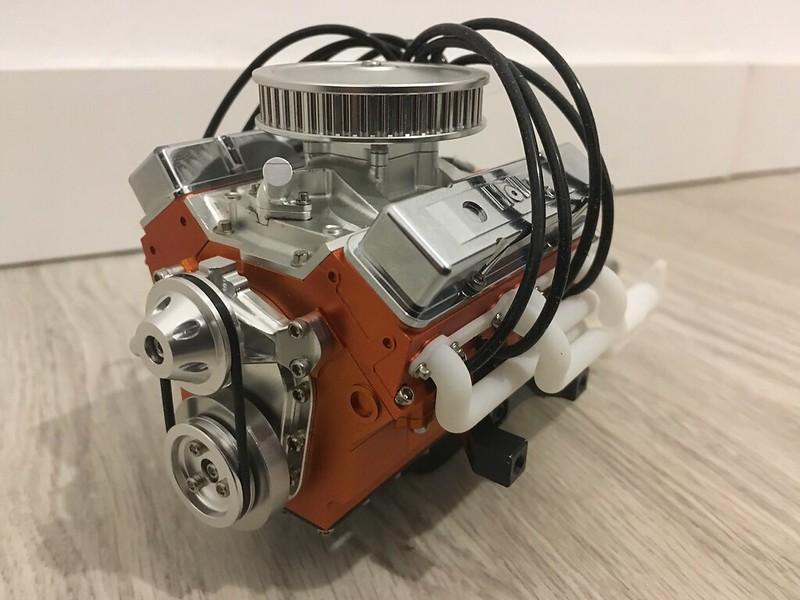
I have advanced the servo to be able to decorate the motor hole with the RC4WD pulleys and ornaments:
 Sin título by alberto espinosa, en Flickr
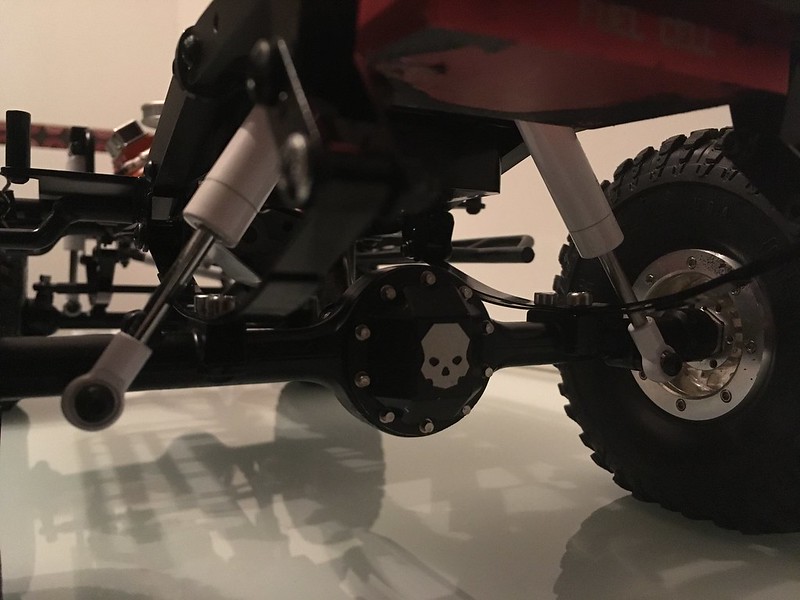
I have mounted the Yota2 of RC4WD with the ballistic diff covers of RC4WD, more elegant and with the direction behind the axle . I had thought of another system with forwarding but like that is enough. I have also removed the smaller leaf spring in front and back, I have mounted soft springs in rear shock that include them as OEM and in the front suspension I have left one of the shock absorbers on each side without a spring. It is softer and it twists easier, it has won a lot:
 Sin título by alberto espinosa, en Flickr
 Sin título by alberto espinosa, en Flickr
 by alberto espinosa, en Flickr
 Sin título by alberto espinosa, en Flickr
 Sin título by alberto espinosa, en Flickr
 Sin título by alberto espinosa, en Flickr
 Sin título by alberto espinosa, en Flickr
 Sin título by alberto espinosa, en Flickr
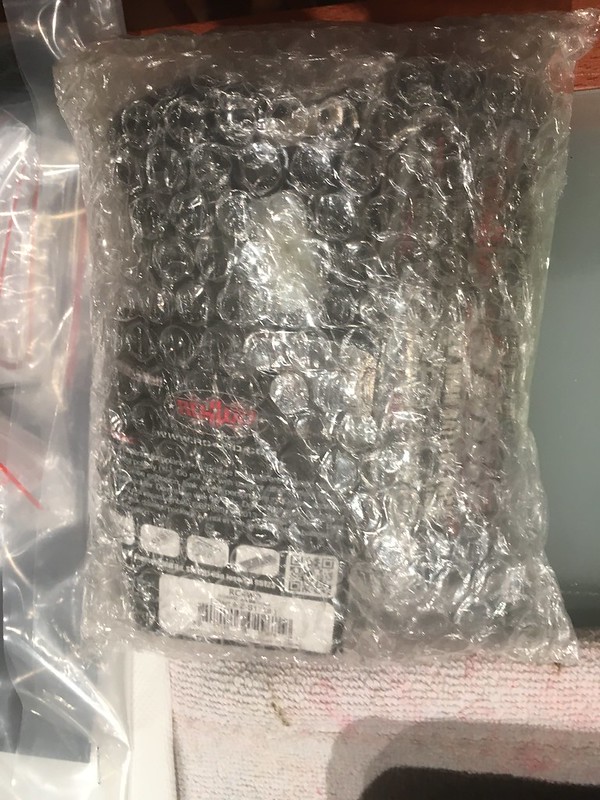
Another detail that I had kept at home, the RC4WD hub nuts Mikey Thomson:
 Sin título by alberto espinosa, en Flickr
And there are still many ... hehehe
A few more things, I needed urgent help and take the opportunity to ask for the bull bar:
 Sin título by alberto espinosa, en Flickr
Some pictures more hehehe:
 Sin título by alberto espinosa, en Flickr
 Sin título by alberto espinosa, en Flickr
 Sin título by alberto espinosa, en Flickr
After a long time, I will assemble the accessories
 Rc4wd v8 extra parts install by alberto espinosa, en Flickr
Radiator , distributor , water pump , pulley kit , thermostat , exhaust headers ...
 Rc4wd v8 extra parts install by alberto espinosa, en Flickr
 Rc4wd v8 extra parts install by alberto espinosa, en Flickr
 Rc4wd v8 extra parts install by alberto espinosa, en Flickr
 Rc4wd v8 extra parts install by alberto espinosa, en Flickr
1 of the 4 radiator clamps was broken so it only takes 3
 Rc4wd v8 extra parts install by alberto espinosa, en Flickr
 Rc4wd v8 extra parts install by alberto espinosa, en Flickr
And after assembling everything, without instructions of anything, following the photos of the web of rc4wd, when mounting the body, the wall in front of the dashboard makes butt with the distributor and can not be mounted without cutting the body
 Rc4wd v8 extra parts install by alberto espinosa, en Flickr
 Rc4wd v8 extra parts install by alberto espinosa, en Flickr
And bull bar :
 Sin título by alberto espinosa, en Flickr
 Sin título by alberto espinosa, en Flickr
Well, year after year we are putting hours on the Blazer who is still a virgin ......
Finally, the front suspension is moved, with no spring in any place and I have changed the turrets sideways because if not, the shock absorbers did not work well. I have also disassembled the V8 again because when changing the ignition distributor the spark plug wires had to be changed too and for this we had to disassemble the manifolds. Once everything is in order, a retightening of screws that comes from a loose source, and also grease as God commands that they are very fair in grease, at least for my taste.
Some workshop photos:
Here everything is taken out:
 89C90988-6E47-42D8-8417-CBBED0E11293 by alberto espinosa, en Flickr
 IMG_1075 by alberto espinosa, en Flickr
Here you see that it is necessary to remove manifolds for the cables:
 E8729EBF-D924-45D8-9318-E801DE01D43D by alberto espinosa, en Flickr
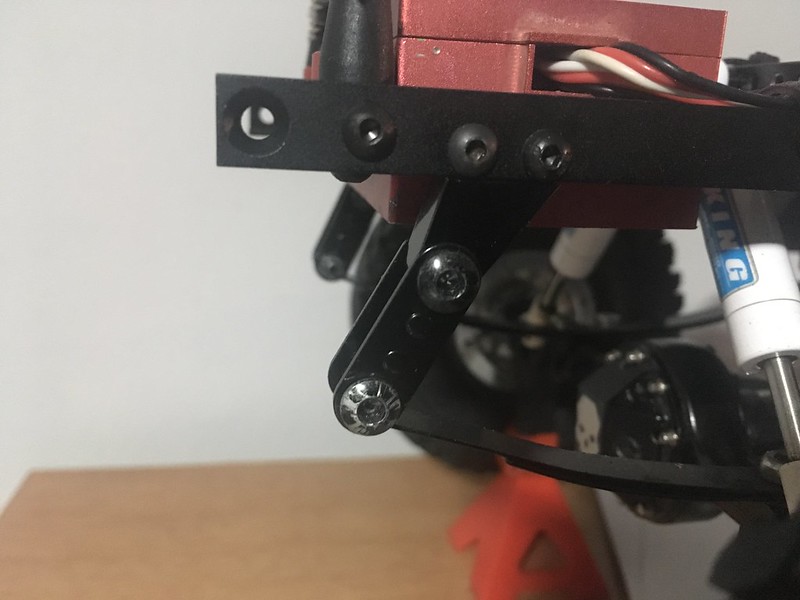
Here we can see where the shock absorber should coincide so that it works as it should and where the turrets are as standard:
 572EDE5B-1A46-452B-AF8D-09FADE007376 by alberto espinosa, en Flickr
So when you turn around, they look like this and work like a vice:
 BDA34D56-559B-4D78-A87B-437EB37E089C by alberto espinosa, en Flickr
A photo of the R4 broken down jjejejejje:
 IMG_1132 by alberto espinosa, en Flickr
I have to add that the front suspension did not move at all unless you took the car with one hand and the axle with the other, with the car's own weight it did not move even a millimeter, now it has about 2-3cm of travel, less than the shock absorbers allow, or higher turrets are placed or 25% of the shock absorber travel is lost
Things are still coming, and more that will come, after a fight via mail with the RC4WD after-sales service, in the end they make me an account on their website for future orders in their online store, just as I said The bad, I say the good, excellent after-sales service the truth, at the moment, with more fight or less, every problem has done something to solve it, so I can be happy that almost 2 years later, they have had a commercial attention and it is Very much appreciated.
Some gummies that will be for another but they arrived:
 IMG_1223 by alberto espinosa, en Flickr
And the rear leaf brackets, to prevent it from snagging:
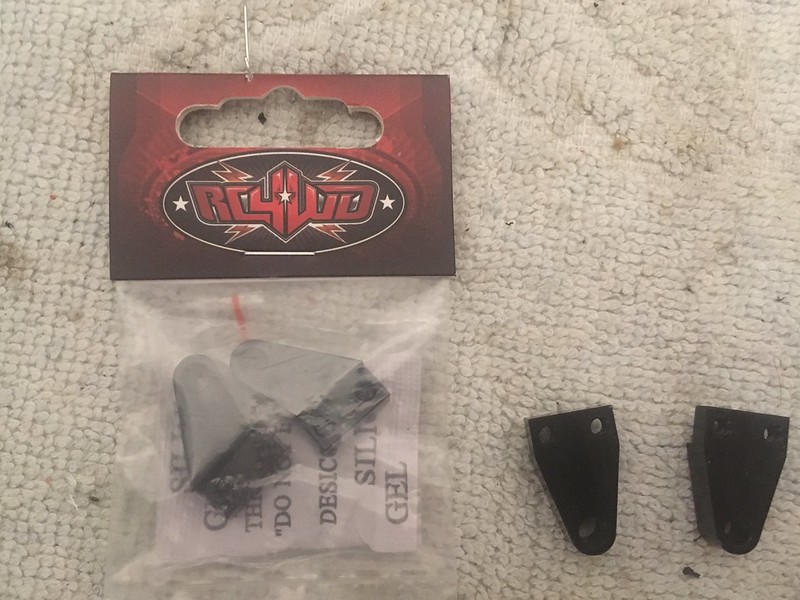 IMG_1266 by alberto espinosa, en Flickr
 IMG_1274 by alberto espinosa, en Flickr
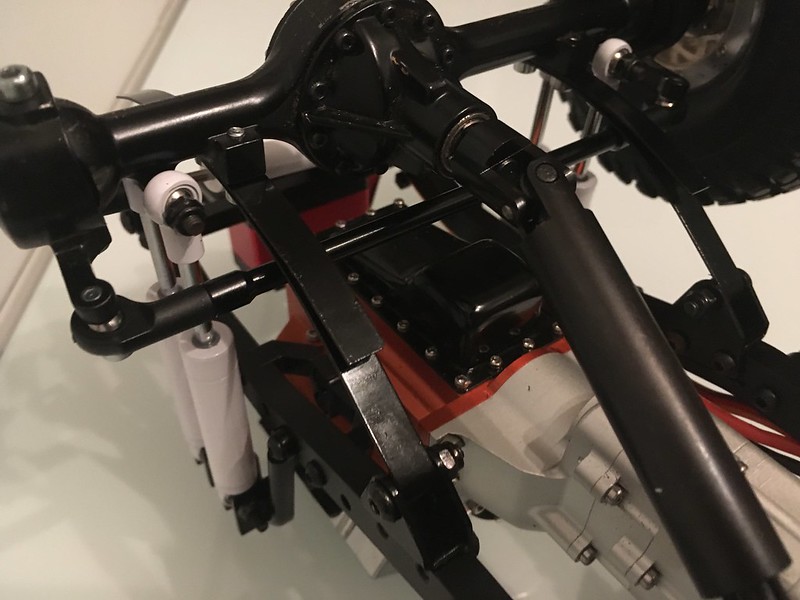
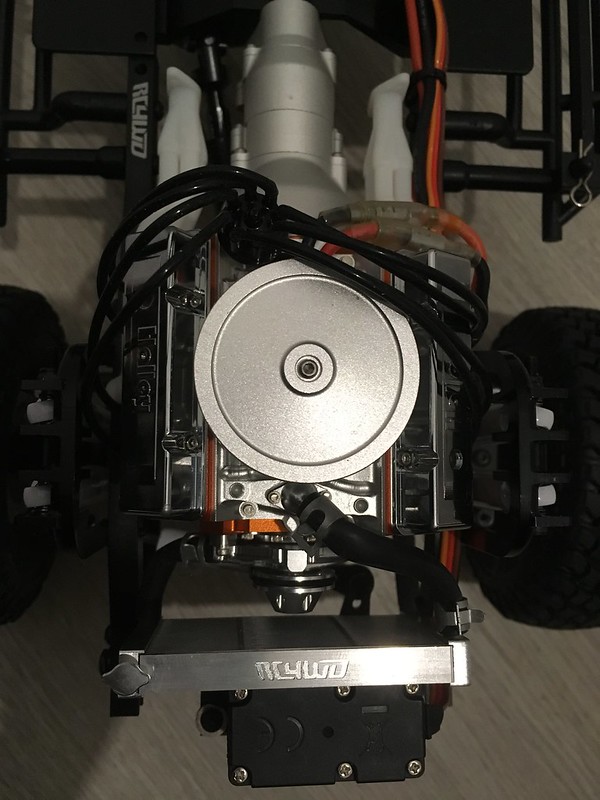
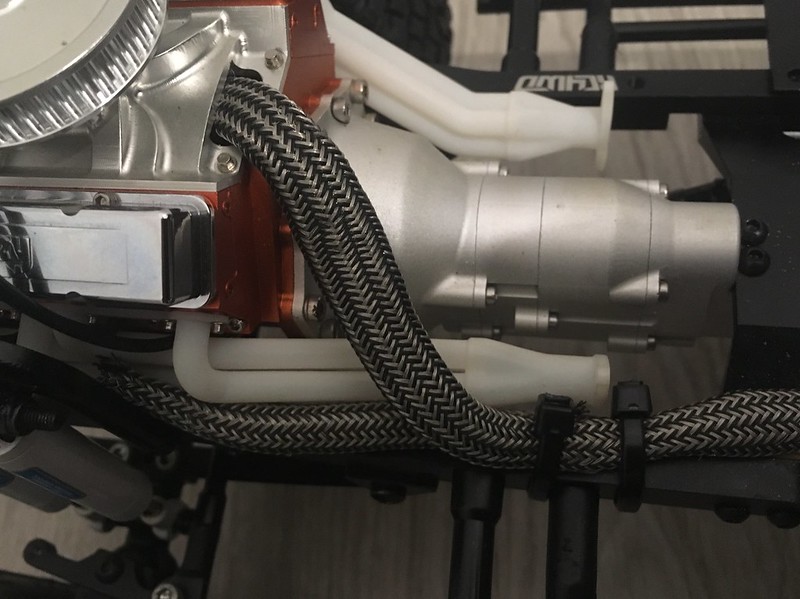
More work, I changed the electronics, a servo from 38kg to 6v with the hobbywing 1080 ESC. Motor I have left the same to see that. I have put more elegant covers to the cables in the part that is seen under the hood. With this configuration everything has entered the aluminum tank and I have been able to remove the tray from the middle.
 1 by alberto espinosa, en Flickr
 2 by alberto espinosa, en Flickr
 3 by alberto espinosa, en Flickr
 4 by alberto espinosa, en Flickr
Released !!! Pleasantly surprised on the ground, very happy
 Sin título by alberto espinosa, en Flickr
 Sin título by alberto espinosa, en Flickr
 Sin título by alberto espinosa, en Flickr
 Sin título by alberto espinosa, en Flickr
 Sin título by alberto espinosa, en Flickr
 Sin título by alberto espinosa, en Flickr
I leave a photo of Saturday in the hangout, I did not make a cabpar, this happened to me Tiko ... hehehe
 Sin título by alberto espinosa, en Flickr
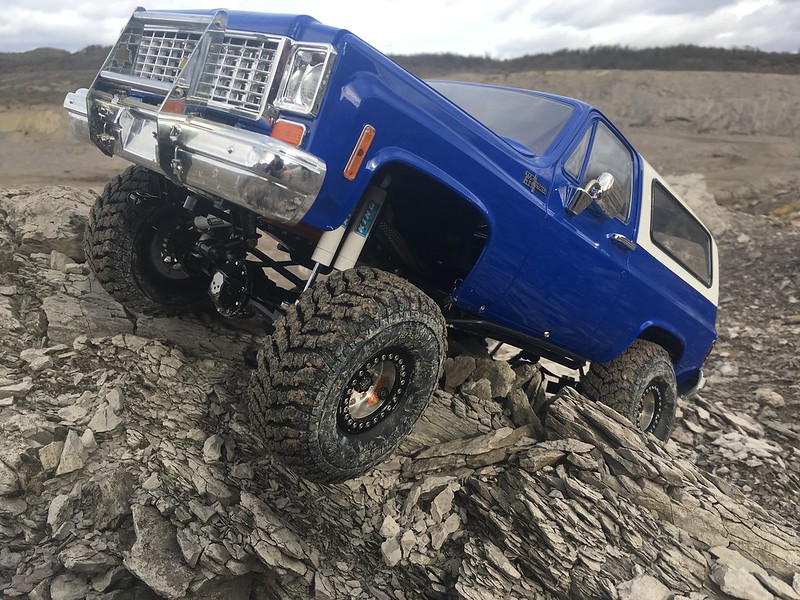
Here the result of the hangout hehehehe, it already has character!
 Sin título by alberto espinosa, en Flickr
And now I get inside:
 Sin título by alberto espinosa, en Flickr
What an illusion to see the box:
Sin título by alberto espinosa, en FlickrSin título by alberto espinosa, en FlickrAnd I start to take out, first a pair of jellies for the V8, some pulleys and the ignition, they did not have more sweets in stock ...
Sin título by alberto espinosa, en FlickrNothing else open, a little screw to the ground, we'll see if it is missing somewhere or it comes from more:
Sin título by alberto espinosa, en FlickrWet does not come hehe :
Sin título by alberto espinosa, en FlickrThe bags with details and paraphernalia vary :
Sin título by alberto espinosa, en FlickrAnother bag with wall and battery charger NIMH:
Sin título by alberto espinosa, en FlickrAnd the transmiter , which comes prepared with the third channel for winch:
Sin título by alberto espinosa, en FlickrI take it out of the box, well protected comes for the compact that is the box and what it includes. First impression, and although I had seen the body live more times, not so the v8 and the r4, but more beautiful live than in the truth photo, used to buy cars, the truth that has surprised me pleasantly:
Sin título by alberto espinosa, en FlickrSin título by alberto espinosa, en FlickrSin título by alberto espinosa, en FlickrThe wheels, precious the truth, the screws and elacabado with the front locks:
Sin título by alberto espinosa, en FlickrAnd the backs the different cap:
Sin título by alberto espinosa, en FlickrAnd what I most expected to see, the V8 with the R4 and the double front shock absorber, quality finishes and detail, impressed me I'm really jejeje, win live:
Sin título by alberto espinosa, en FlickrSin título by alberto espinosa, en FlickrSin título by alberto espinosa, en FlickrFor the time being it's everything, it's a workshop, first to change the yota1 for some yota2 with ballistic caps and change wheels hehehe, then more things that I'll tell you.
Test the wheels:
Sin título by alberto espinosa, en FlickrSin título by alberto espinosa, en FlickrSin título by alberto espinosa, en FlickrAnd the axes that will lead to the wait:
Sin título by alberto espinosa, en FlickrI changed the fuel tank for one of alu in red from RC4WD:
Sin título by alberto espinosa, en FlickrI have advanced the servo to be able to decorate the motor hole with the RC4WD pulleys and ornaments:
Sin título by alberto espinosa, en FlickrI have mounted the Yota2 of RC4WD with the ballistic diff covers of RC4WD, more elegant and with the direction behind the axle . I had thought of another system with forwarding but like that is enough. I have also removed the smaller leaf spring in front and back, I have mounted soft springs in rear shock that include them as OEM and in the front suspension I have left one of the shock absorbers on each side without a spring. It is softer and it twists easier, it has won a lot:
Sin título by alberto espinosa, en FlickrSin título by alberto espinosa, en Flickr by alberto espinosa, en FlickrSin título by alberto espinosa, en FlickrSin título by alberto espinosa, en FlickrSin título by alberto espinosa, en FlickrSin título by alberto espinosa, en FlickrSin título by alberto espinosa, en FlickrAnother detail that I had kept at home, the RC4WD hub nuts Mikey Thomson:
Sin título by alberto espinosa, en Flickrsgtlt;5814080 said:awesome truck, really liking the upgrades
And there are still many ... hehehe
A few more things, I needed urgent help and take the opportunity to ask for the bull bar:
Sin título by alberto espinosa, en FlickrSome pictures more hehehe:
Sin título by alberto espinosa, en FlickrSin título by alberto espinosa, en FlickrSin título by alberto espinosa, en FlickrAfter a long time, I will assemble the accessories
Rc4wd v8 extra parts install by alberto espinosa, en FlickrRadiator , distributor , water pump , pulley kit , thermostat , exhaust headers ...
Rc4wd v8 extra parts install by alberto espinosa, en FlickrRc4wd v8 extra parts install by alberto espinosa, en FlickrRc4wd v8 extra parts install by alberto espinosa, en FlickrRc4wd v8 extra parts install by alberto espinosa, en Flickr1 of the 4 radiator clamps was broken so it only takes 3
Rc4wd v8 extra parts install by alberto espinosa, en FlickrRc4wd v8 extra parts install by alberto espinosa, en FlickrAnd after assembling everything, without instructions of anything, following the photos of the web of rc4wd, when mounting the body, the wall in front of the dashboard makes butt with the distributor and can not be mounted without cutting the body
Rc4wd v8 extra parts install by alberto espinosa, en FlickrRc4wd v8 extra parts install by alberto espinosa, en FlickrAnd bull bar :
Sin título by alberto espinosa, en FlickrSin título by alberto espinosa, en FlickrWell, year after year we are putting hours on the Blazer who is still a virgin ......
Finally, the front suspension is moved, with no spring in any place and I have changed the turrets sideways because if not, the shock absorbers did not work well. I have also disassembled the V8 again because when changing the ignition distributor the spark plug wires had to be changed too and for this we had to disassemble the manifolds. Once everything is in order, a retightening of screws that comes from a loose source, and also grease as God commands that they are very fair in grease, at least for my taste.
Some workshop photos:
Here everything is taken out:
89C90988-6E47-42D8-8417-CBBED0E11293 by alberto espinosa, en FlickrIMG_1075 by alberto espinosa, en FlickrHere you see that it is necessary to remove manifolds for the cables:
E8729EBF-D924-45D8-9318-E801DE01D43D by alberto espinosa, en FlickrHere we can see where the shock absorber should coincide so that it works as it should and where the turrets are as standard:
572EDE5B-1A46-452B-AF8D-09FADE007376 by alberto espinosa, en FlickrSo when you turn around, they look like this and work like a vice:
BDA34D56-559B-4D78-A87B-437EB37E089C by alberto espinosa, en FlickrA photo of the R4 broken down jjejejejje:
IMG_1132 by alberto espinosa, en FlickrI have to add that the front suspension did not move at all unless you took the car with one hand and the axle with the other, with the car's own weight it did not move even a millimeter, now it has about 2-3cm of travel, less than the shock absorbers allow, or higher turrets are placed or 25% of the shock absorber travel is lost
Things are still coming, and more that will come, after a fight via mail with the RC4WD after-sales service, in the end they make me an account on their website for future orders in their online store, just as I said The bad, I say the good, excellent after-sales service the truth, at the moment, with more fight or less, every problem has done something to solve it, so I can be happy that almost 2 years later, they have had a commercial attention and it is Very much appreciated.
Some gummies that will be for another but they arrived:
And the rear leaf brackets, to prevent it from snagging:
More work, I changed the electronics, a servo from 38kg to 6v with the hobbywing 1080 ESC. Motor I have left the same to see that. I have put more elegant covers to the cables in the part that is seen under the hood. With this configuration everything has entered the aluminum tank and I have been able to remove the tray from the middle.
1 by alberto espinosa, en Flickr2 by alberto espinosa, en Flickr3 by alberto espinosa, en Flickr4 by alberto espinosa, en FlickrReleased !!! Pleasantly surprised on the ground, very happy
Sin título by alberto espinosa, en FlickrSin título by alberto espinosa, en FlickrSin título by alberto espinosa, en FlickrSin título by alberto espinosa, en FlickrSin título by alberto espinosa, en FlickrSin título by alberto espinosa, en FlickrI leave a photo of Saturday in the hangout, I did not make a cabpar, this happened to me Tiko ... hehehe
Sin título by alberto espinosa, en FlickrHere the result of the hangout hehehehe, it already has character!
Sin título by alberto espinosa, en FlickrAnd now I get inside:
Sin título by alberto espinosa, en Flickr Sin título
 Sin título
 Sin título
 Sin título
 Sin título
 Sin título
 Sin título
 Sin título
 Sin título
 Sin título
 Sin título
 Sin título
 Sin título
 Untitled
 Untitled
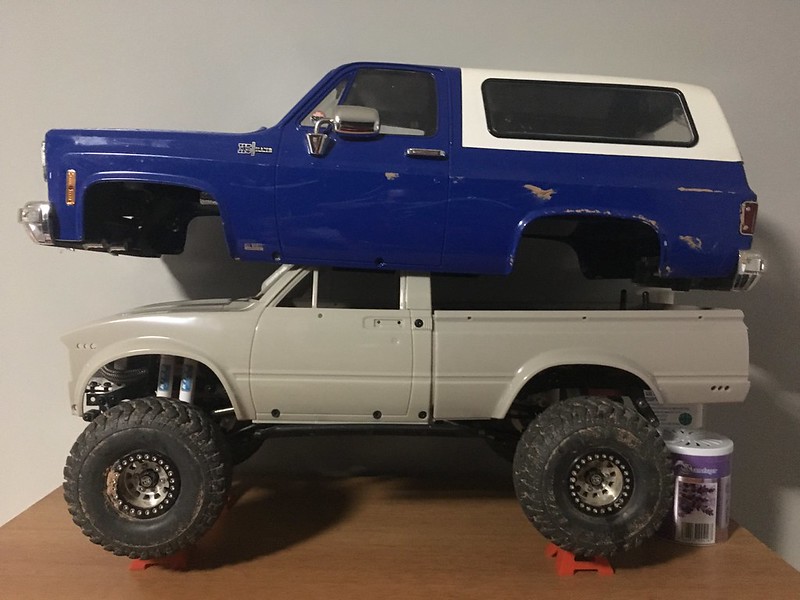 Untitled
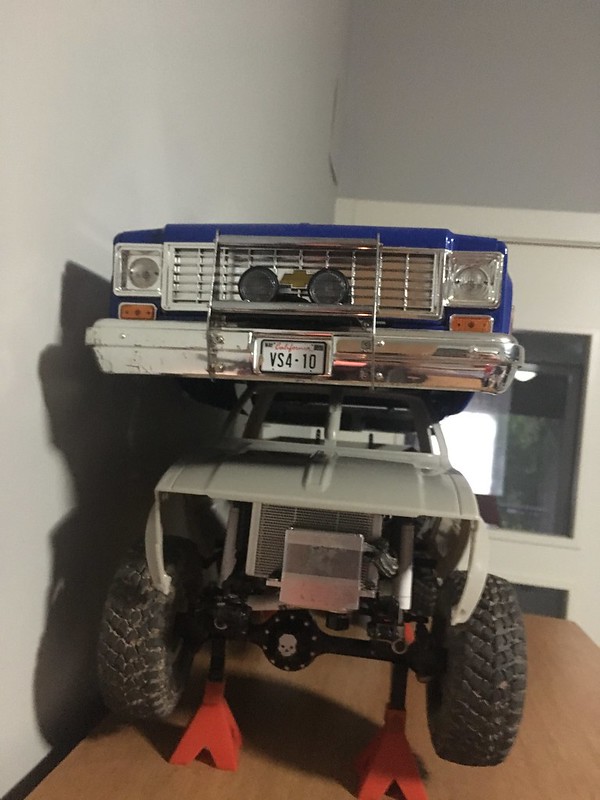 Untitled
 Untitled
 Untitled
 Untitled
 Untitled
 Untitled
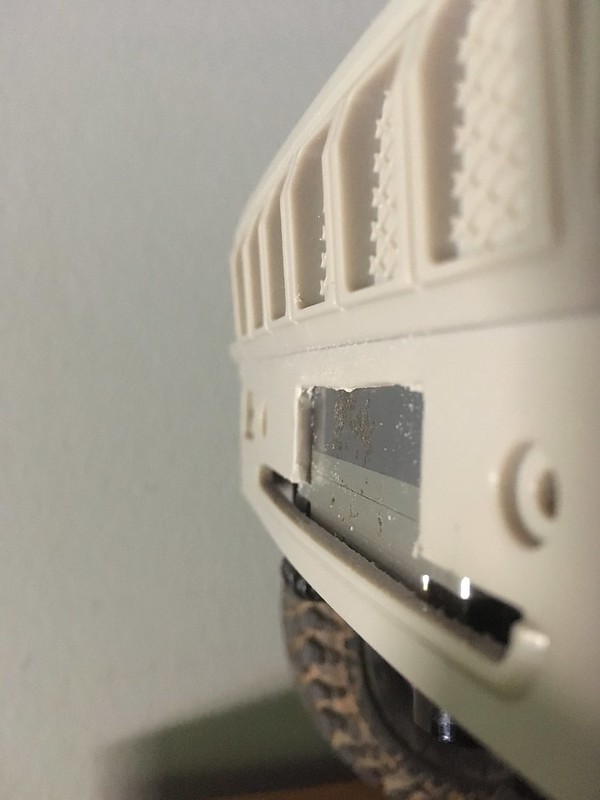 Untitled
 Untitled
 Untitled
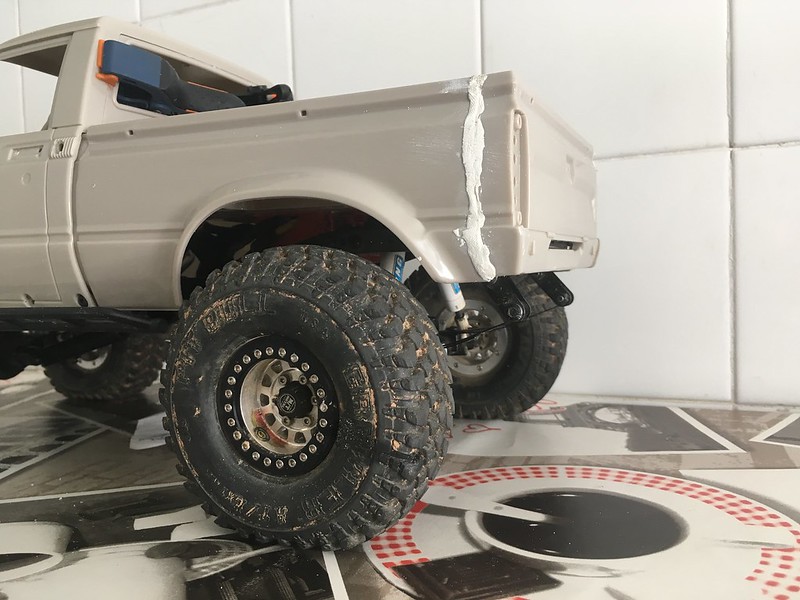 Untitled
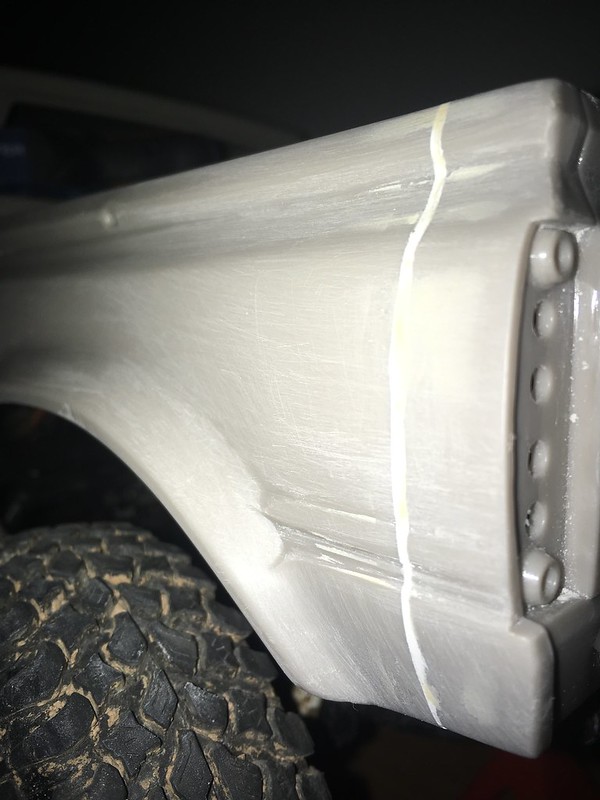 Untitled
 Untitled
 Untitled
 Untitled
 Untitled
 Untitled
 Untitled
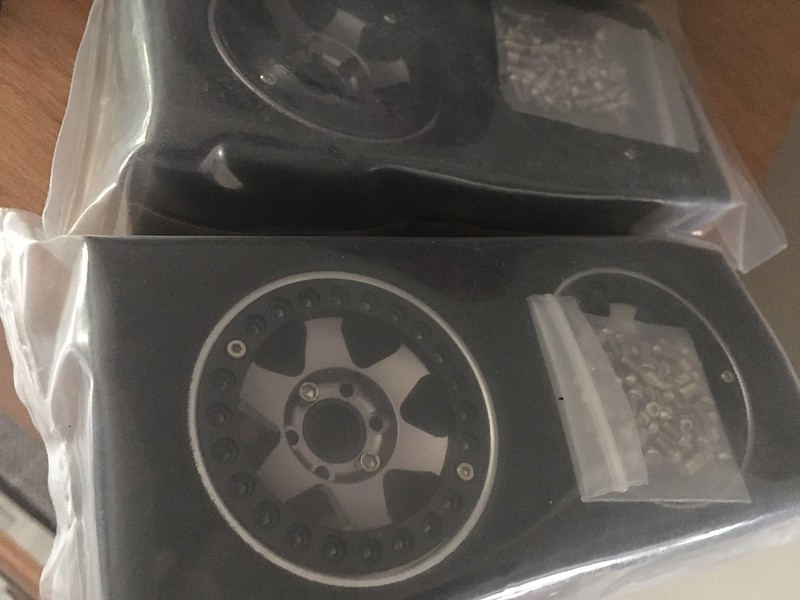 Untitled
 Untitled
 Untitled
 Untitled
 Untitled
 Untitled
 Untitled
 Untitled
 Untitled
 Untitled
 Untitled
 Untitled
 Untitled
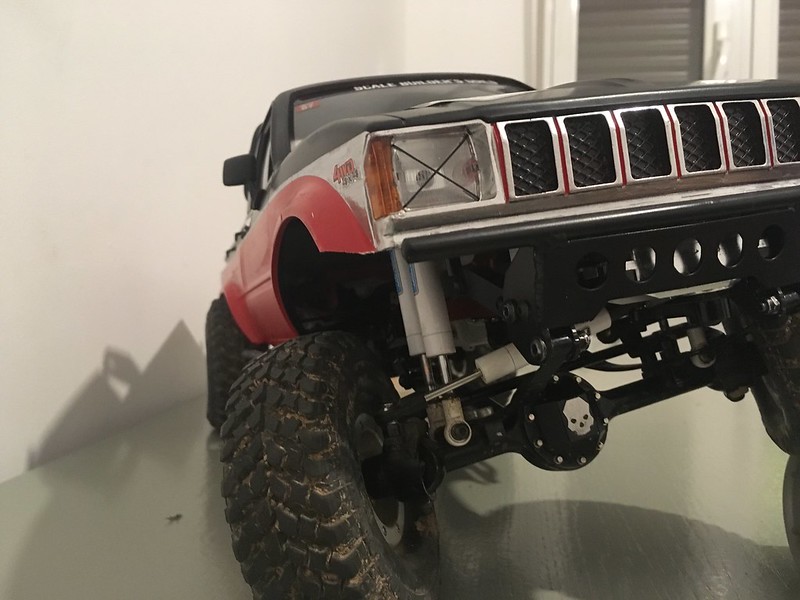 Untitled
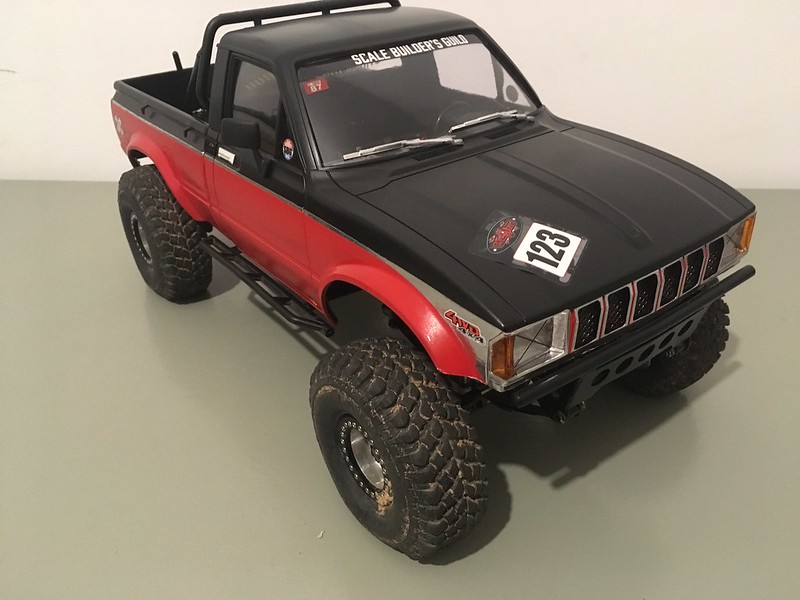 Untitled
 Untitled
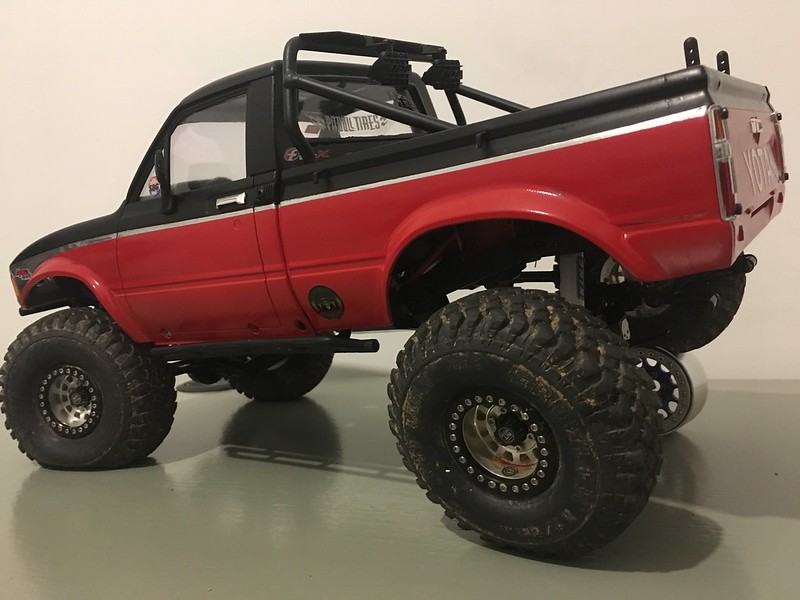 Untitled
 Untitled
 Untitled
 Untitled
 Untitled
 Untitled