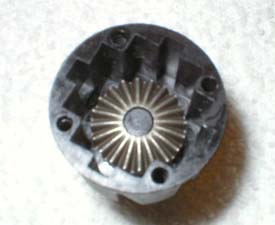
13. You can now remove the front of the diff housing by simply pulling it straight off (direction of yellow arrow). Next, you can simply remove the diff case by pulling it out (direction of red arrow).
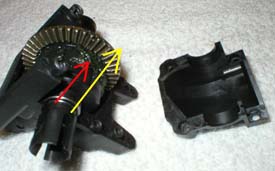
14. Now it's time to finally get into the diff case. You do this by simply removing the 4 screws below in yellow.
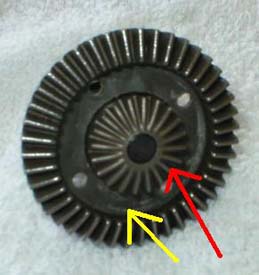
15. After the screws are removed, you can simply pop the gear off the plastic diff case. BE CAREFUL when you are opening up the diff. There is a piece of gasket (below in yellow), which seals the inside of the diff. You don't want this gasket to tear, rip, wrinkle, or have anything else happen to it. If you do, it won't seal your diff up when you go to reassemble everything and you will simply have a mess.
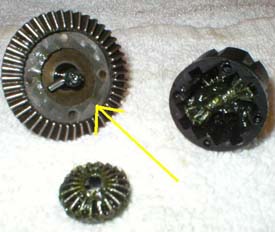
16. Now it's time to clean everything inside of the diff cup. If the gasket stayed stuck to the diff gear (as it did in the above pic), then leave it there. There isn't a need to remove the gasket b/c you run a risk of ripping it. You can simply spray the grease off the gasket where it is.
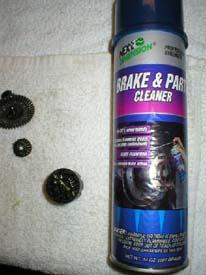
Make sure you clean the gasket, all the gears inside, pins, and the diff cup itself. You don't want any of the factory grease left on anything. This is where a good choice for a degreaser comes in handy. You can use any brand of degreaser that you choose. I used what I always use to clean my truck off with, Automotive Non-Chlorinated Brake Cleaner. It removes grease, dirt, grime, and doesn't leave any residue behind. It works like a champ and can be found at any auto parts store for less than $3.
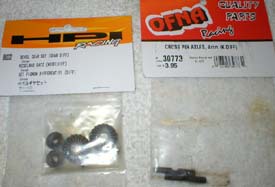
17. Now it's time to open the bevel gear set and the cross pins. You will be using both pins and the two small bevel gears. The two large bevel gears will not be used and can be saved as a backup set.
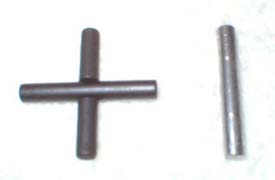
18. Here is a pic showing the new cross pins versus the old single pin.
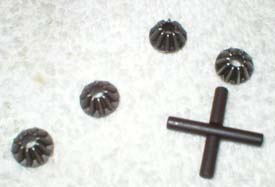
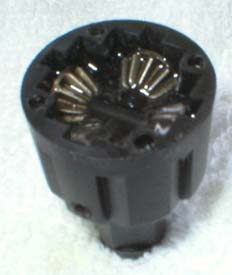
19. Now you can assemble the cross pin gears. Take one cross pin and lay it down with the cut out facing up. Now take the second cross pin and lay the cut out on top of the first pin. Make sure that the pins are facing opposite directions. The cut out's from the pins will lock the pins together.
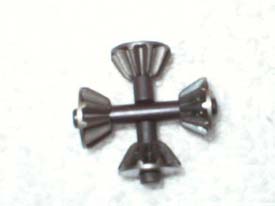
Now take the 2 old small gears & the 2 new small gears and slide them onto the cross pins as shown in the pic below. Make sure that the teeth are facing the proper way (towards the center of the pins).
20. Before you put the spider gears in, test your diff cup to make sure that the large bevel gear is still in place and the pin is still behind it. You can pick up the diff cup and spin the drive shaft cup. When you spin the drive shaft cup, the large bevel gear should immediately begin spinning.
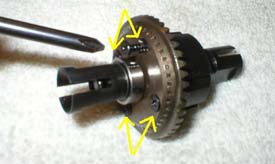
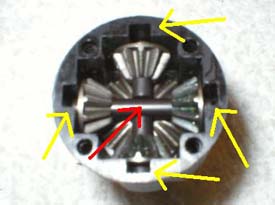
21. Now simply pick up the cross pins (being sure to keep them together as one piece) and slide them down into the diff cup. There are grooves in the diff cup that the pins will slide down into (seen by the yellow arrows). After the spider gears are seated, you should now test the diff again. Simply pick it up and hold one finger down on the center of the cross pins (seen by the red arrow). Now take the other hand and spin the drive shaft cup. When you spin the dog bone cup, you should see all the small bevel gears spinning. If you don't hold your finger on the cross pins, all the gears will want to come out of the diff cup when you spin the drive shaft. Spinning the gears will help seat them properly and allow you to feel if there is any type of binding or issues with the gear teeth not matching up.
22. Now you can fill your diff cup with your oil. You want to put enough oil in the cup to fill it up to the TOP EDGE of the cross pin. If you fill it any more than this, you increase the risk of blowing out your diff case because the oil will EXPAND when the gears are spinning.
23. After you add the fluid to the proper level, it is a good idea to once again test your gear alignment and to help the fluid get into all the necessary crack & crevices. Simply hold one finger on the center of the cross pins, take your other hand, and spin the drive shaft cup on the bottom of the diff housing. You will notice that the fluid should expand and bubbles will be trapped in the fluid. This is normal and is nothing to worry about. The bubbles will eventually work their way out. If everything seems smooth and you didn't find any problems, then it is time to begin reassembly.
24. Simply place the top back onto the diff case. Make sure that the paper gasket is properly seated and that the large bevel gear is also properly attached.
25. After you screw the 4 screws back into the diff housing, it is a good idea to do a final check to make sure that the lid is properly meshed together. Simply hold each drive shaft cup in one hand and spin them. You shouldn't feel any grinding or binding and everything should turn smoothly.
26. Now you can simply reassemble everything and then do the mod to the other diff. After the second diff, simply reassemble your truck. It is a good idea to do a grand final test with your truck before you run it. When you are completely done putting everything, back together, simply roll the truck on the ground, and make sure that everything seems fine. If everything looks good, then do a steering & throttle check with your radio. Once you pass this, then it's time to bash and enjoy your work.
- Pages:
- 1
- 2