• Welcome to RCTalk! 🚀

    Join the #1 RC community where hobbyists connect, share, and get expert advice on RC cars, trucks, boats, drones, and more!

    • Friendly & passionate RC enthusiasts
    • RC tips & troubleshooting
    • Buy, sell & trade RC gear
    • Share builds & upgrades

Airbrushing shadows

This site may earn a commission from merchant affiliate
links, including eBay, Amazon, and others.

jgscott

RC Newbie
Messages
11
Reaction score
0
Points
0
RC Driving Style
I am looking for suggestions or tips on airbrushing shadows.

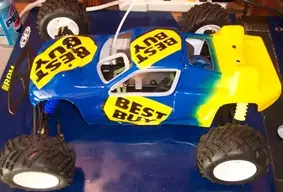
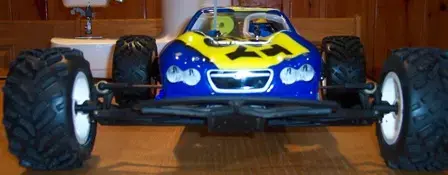
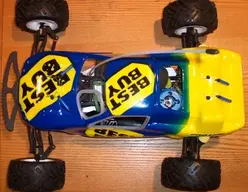
I work for Best Buy and I am painting a lid for a XXX-NT (proline crowd pleaser) that uses the Best Buy tag logo on the doors roof and hood. In case anyone would not be familiar with the color scheme I am using Parma blue, yellow and black. The base of the body is blue and the tag shape is yellow with black lettering. I will then phase the blue into all yellow on the tail end of the lid.

I would like to make it look like the tag shape is raised off the under coat by placing a shadow around the edge. However, in the samples I have been working on, I can’t seem to get the shadow looking real enough. It is either to dark with too crisp of an edge or it is so light that it gets lost in the blue undercoat.

If anyone knows of a good online “how to” or can offer advice I would appreciate it.
 
Last edited:
Here is a how to by R/C Tech:

1---Start spraying by pushing down on the trigger of your airbrush and pull back to spray a heavy coat of paint.

2---Slowly move your brush back and forth covering the area.

3---To fade, begin to pull your hand up, increasing the distance between your brush and the surface you are painting.

4---As you gain practice, slowly learn to move your finger forward, lessening the amount of air flowing through the brush.

http://www.rctech.net/articles/painting_hauntedmyst3.shtml

I don't have any personal tips b/c my airbrush tip is too coarse & I can't fade w/ it. I'm trying to save up some $$$ to get a nice one. Anyway, good luck.

Later....:mex:
 
I would suggest 2 options.
First, you could just use a faded shadow. Decide which direction the shadow will go. I would suspect it will look best on the bottom and right edge. When you go to paint the faded shadow, you actually want to aim along the bottom of the mask, not the body. The shadow will then mist over the edge and give you the faded shadow.
Another option is a more hard shadow. In this case, simply cut a thin mask that will place a drop shadow under your tag. When you paint, it's just like painting a defined thick black line on 2 sides of the tag. This way you won't have to try to fade it, but will still have a shadow effect.
 
Well, here is how it turned out. I did not really get the shadow effect I was looking for and the fade didn't work as well as I had hoped, but I think it come out OK. I am definitely getting better at masking and painting these things. Thanks for the input on technique.
 

Attachments

  • BBY - On RS - Web.webp
    BBY - On RS - Web.webp
    21.5 KB · Views: 206
  • BBY - On Front - Web.webp
    BBY - On Front - Web.webp
    10.5 KB · Views: 198
  • BBY - On Top - Web.webp
    BBY - On Top - Web.webp
    23.6 KB · Views: 197
The tags turned out pretty good. But the fade could use some improvement. However, it looks good considering your first try at it. It looks like you sprayed the yellow first when you were doing the fade. Next time try to spray the darker colors first. That way you won't get any color bleed.

BTW, are they your sponsor?

Later....:mex:
 
As far as Best Buy being my sponsor, if you mean "do I get a paycheck from them so I have money to run my car", then yes. I actually work for Best Buy at their corporate facility in Minneapolis.

I actually sprayed the blue before the yellow, but I got to close to the masked area to get a smooth fade without the solid line showing up.
 
If you're going to do a fade like that from blue to yellow, don't even mask the border. Just freehand the transition and you won't have to worry about the mask line showing up.
 
Back
Top