Killers 'Black n Blue' JK Rubi Brute Build

Welcome to RCTalk

Come join other RC enthusiasts! You'll be able to discuss, share and private message with other members of our community.

This site may earn a commission from merchant affiliate
links, including eBay, Amazon, and others.

HPI-Killer

Axial Axle Twisting Guru
Supporter
Messages
5,238
Reaction score
64
Location
Northern Utah
RC Driving Style
  1. Bashing
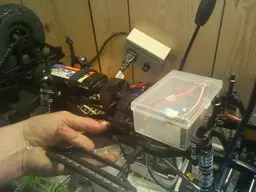
This makes I don't know my 5, 6th axial kit? Lol I have owned MANY of Axials kits and can't get enough of them! Got my taxes back and droped just about $1,000 to get myself set up and ready for a spring build.

Here is what I have coming:

•1 of : HOLMES HOBBIES TORQUE MASTER EXPERT MOTORS (27T)
$45.99
•1 of : Junfac Hardened Universal Shaft for Axial SCX10 Dingo (2)
$34.00
•3 of : PIT BULL 1.9 Mad Beast Scale Tire with 2 Stage Foam (2)
$89.97
•3 of : Pro-Line FaultLine 1.9" Black/Black Bead-Loc 10 Spoke Front or Rear Wheels (2) for Rock Crawlers
$80.97
•1 of : RC ROCK ARMOR - SCX10 Rear Bumper with Swingout Spare Tire Carrier
$58.99
•1 of : RC4WD Chassis Mounted Steering Servo Kit with Panhard Bar for Axial SCX10
$54.99
•1 of : Savox SC-1256TG Standard Digital "High Torque" Titanium Gear Servo
$79.99
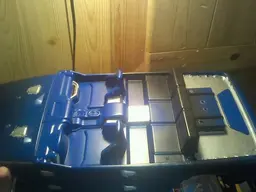
•1 of : SCX10™ 2012 Axial Jeep® Wrangler Unlimited Rubicon 1/10th Scale Electric 4WD - Kit
$299.99
•1 of : Tekin FXR ESC FWD/BRK/REV
$99.99

I am really excited about Pit Bulls new 1.9 scale tire!!

Should be here by the weekend!
 
This should be good, can't wait for the build pics to start!
 
Oh this is going to be good! Pictures needed ASAP.
 
Alright guys I have put about 3 days into this kit and man she is one of the most detailed SCX10 rigs I have ever built along with the HARDEST body I have had to cut out for an RC in general! I have spent at least 6 hours hand painting alot of small details to bring it out of the norm and this is what I have to show for it!

Custom painted electronic box.

DSCF5406_zps716ff1c7.jpg

DSCF5447_zps56c6ebc9.jpg


Painted upper links
DSCF5409_zpsba7b3d02.jpg

Custom front bumper along with a hand painted Spyder logo (hard as hell to paint!) and a cool frayed wire effect for the left fog light :hehe:
DSCF5407_zps62fe1623.jpg

Hand Painted Gas Tank Top
DSCF5411_zpsf6fcaa29.jpg

RC4WD CMS Panhard Kit
DSCF5419_zps15f735c8.jpg
DSCF5451_zps58e286ab.jpg

Cute hand painted hub covers
DSCF5416_zps318ece5c.jpg

Gear Shift Unit
DSCF5434_zps342dc113.jpg


Top & Bottom Of The Painted Rock Sliders
DSCF5417_zpsbb0ae798.jpg
DSCF5444_zpse41d4466.jpg


Peace Sign Steering Wheel
DSCF5424_zps5700404b.jpg

Small Roll Cage Visual Effects
DSCF5429_zps374e9b97.jpg
DSCF5427_zps7fffd75e.jpg

My Biggest Achievment Is my Set Of 5 Hand Painted Wheels For The New Pitbulls!!! I LOVE the way they came out and took me damn near 3.5hrs to hand paint!!! I wanna know how you like them!
DSCF5433_zps05ccac7e.jpg
DSCF5422_zps0d531575.jpg
DSCF5408_zpsbc24abeb.jpg


Mock Up
DSCF5431_zpsbf7238d5.jpg
DSCF5432_zpsce8e8d8b.jpg

Basic Light Kit For The Headlights & Markers
DSCF5439_zpsdd8fd054.jpg

Beard Net From A Previous Job That Will Be Used As A Mesh For The Cage (Like My Previous SCX10)DSCF5438_zps61cf401b.jpg

Wont Skip On The BEC This Time :D
DSCF5435_zpsd90b871a.jpg

And I gotta Throw A Little Bit Of Gamer Nerdyness onto it!
DSCF5440_zps812e1789.jpg
 
It's looking great so far, I love all of the hand painted parts...they make the difference in the end when it all comes together!
 
Very nice Loring! Cool to see little touches being done, they add up so well! Good to see you back in action too.
 
Thanks guys I appreciate the kind compliments on the fine tuned details! I love hand painting as much of my rig as possible without becoming gaudy! by far the funnest part of the build is hand painting of parts and the color scheme & design of the body! I really do try to go beyond the 'average' Joe Schmo builder that adds no personal details to make it stand out and become one of a kind, blah!

can't wait to get home!!! Cannot stop thinking about this truck!!

PS-I LOVE the look of the new PB Mad Beast tires, awesome design with the same sticky feel that wont disapoint!
 
Heres an idea I have been tossing around to make my JK just that much more unique. I am deciding whether or not to cut the rear cage off flush behind the 3rd vertical bar from the front. From the bar directly above the rear shock (shown) and doing some sort of rag top or "Jeep Truck/Brute" style look. IDK what do you all think about that?
DSCF5430_zpsaafc06bc.jpg
 
I say go for it. So many of these rigs now that are identical, change that bish up, would be cool for sure.
 
You sir are right, I can't even find other JK Rubi rigs with custom altered cages... I just have to assure the shell will still fit nice and still have the proper strength to take the impact abuse. If all checks out I will hit the drawing board for a rag/soft top design.
 
Just got my Tough Armor rear bumper with the swing out spare, now hand painting the biggest puzzle color scheme on my interior.... Oooo also installed a water tight sealed electronics box for my, err electronics... should be done and ready to play by this afternoon!! Amd of course, gotta launch a YouTube video of it, duh!
 
Lol took me about an hour to solder 2 Traxxas connector tabs with the BEC wire playing games but thats finally done. I removed box electronic boxs akd replaced it with a Savox servo case installed with the servo axle plate, bolted right on. Here is the progress on both body and chassis, dont be alarmed the body is still masked so I can use it like liquid-mask to paint my 5-6 color scheme interior.
 

Attachments

  • uploadfromtaptalk1394385822355.jpg
    uploadfromtaptalk1394385822355.jpg
    88.6 KB · Views: 271
  • uploadfromtaptalk1394385881004.jpg
    uploadfromtaptalk1394385881004.jpg
    72.9 KB · Views: 259
Rig looks fantastic like all your builds! I love all the little detail work. And I agree on the body, those fender flare tabs were a PITA to trim out before painting.

Quick question though; I know you crawl a lot so I figured you'd have moved the battery up front for more weight on the front end. Again, not criticizing just asking.
 
Thanks HPI that means alot to me, I love attention to detail! I was going to install the battery up front (still might) but I was afraid of the body not fitting over top or having the body up higher and making it look goofy.. I am tired of painting and wish I were done because my fingers are so so pretty now... lol :hehe:


*edit* And I just glanced at my front end and realized the servo and cms are right in the way of a front mounted pack, damn!
 
Last edited:
I mounted mine cross ways on the downward angled part of the frame leading towards the trans / motor using a Wraith battery tray. Not sure with the CMS, but I have no issues with body clearance with the body sitting in the normal position, and it gets the battery as low as possible while still having forward weight bias. I can fit a 4000mah 2s or 3s in there no problem. Here's a shot of mine.

teS9VYc.jpg
 
Interesting, I am going to have to tinker with some ideas on that because IMO the pack in the back bllloooowws....


I baught a traxxas Y adapter to run 2 packs at once, can the FXR handle 2 5000mah NiMH packs?
 
Are you talking about running in series or parallel? The ESC has a max rating of 3s, and only if you're running a 35T or above. This copied text below is straight from Tekin's site. Now, that's not to say that some of us don't always follow the rules exactly, but we do so at our own risk. My pro4 in the Wraith isn't rated for 4s, but in small bursts it hasn't hurt anything yet. :D

Input Voltage: 4-9 Cells, 2S Lipo (3S Lipo with 35T or higher motor)
 

Similar threads

HPI-Killer
  • Locked
Replies
13
Views
3K
HPI-Killer
HPI-Killer
Back
Top