• Welcome to RCTalk! 🚀

    Join the #1 RC community where hobbyists connect, share, and get expert advice on RC cars, trucks, boats, drones, and more!

    • Friendly & passionate RC enthusiasts
    • RC tips & troubleshooting
    • Buy, sell & trade RC gear
    • Share builds & upgrades

DHK Hobby Wolf 2/Raz-R2/Cage-R wing upgrade.

This site may earn a commission from merchant affiliate
links, including eBay, Amazon, and others.

biggman100

Hardcore RCTalk User
Build Thread Contributor
Messages
1,921
Reaction score
1,334
Points
420
Location
Corning, NY
RC Driving Style
  1. Bashing
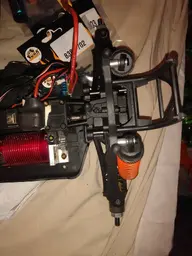
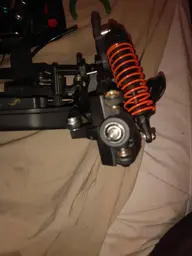
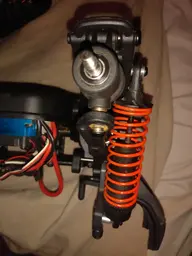
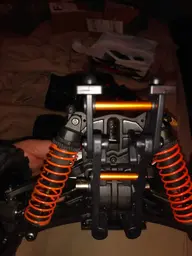
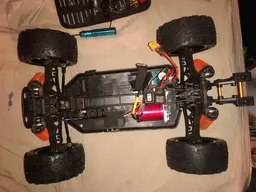
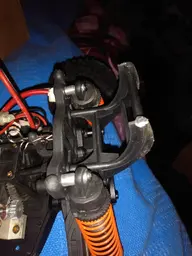
This is for anyone who has a DHK Hobby Wolf 2 or Raz-R 2, or the Cage-R, but it will work on pretty much any DHK vehicle if you are looking for a more durable solution. I have even used this wing on a Hunter BL when i turned it into a truggy. You need the parts for the original DHK Raz-R. I came up with this idea after breaking 3 wing mounts (they break right under where the wing sits) on my Wolf 2 in less than a month. In the states, the best place to get the parts from is RCHobbyExplosion.com. Here is the parts list:

DHK Wing Mount and Brace Left and Right, 8381-804T
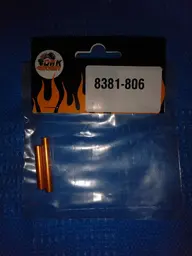
DHK Rear Wing Rod Long and Short, 8381-806
DHK 3x18mm BH Screw (16pcs), 8381-803
DHK 3x10mm BH Screw (16pcs), 8381-805
DHK 3x12mm BH Coarse Thread Screw (16pcs), 8381-605
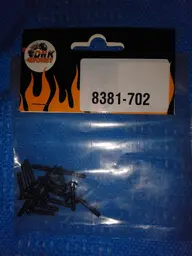
DHK 3x14mm BH Coarse Thread Screw (16pcs), 8381-702

You dont necessarily need the screws. I got them because it was easier than digging through a parts box for them, and cheaper than finding them locally.
 

Attachments

  • IMG_20210128_194106729.webp
    IMG_20210128_194106729.webp
    105.2 KB · Views: 207
  • IMG_20210128_194311022.webp
    IMG_20210128_194311022.webp
    213.2 KB · Views: 165
  • IMG_20210128_193907944.webp
    IMG_20210128_193907944.webp
    42.3 KB · Views: 117
  • IMG_20210128_193918736.webp
    IMG_20210128_193918736.webp
    74.8 KB · Views: 131
  • IMG_20210128_193928806.webp
    IMG_20210128_193928806.webp
    92.1 KB · Views: 116
  • IMG_20210128_193940741.webp
    IMG_20210128_193940741.webp
    98.4 KB · Views: 106
  • IMG_20210128_193952601.webp
    IMG_20210128_193952601.webp
    72.1 KB · Views: 104
  • IMG_20210128_194006399.webp
    IMG_20210128_194006399.webp
    61.3 KB · Views: 105
  • IMG_20210128_194333646.webp
    IMG_20210128_194333646.webp
    95.4 KB · Views: 112
Thanks for sharing @biggman100
I ended up having a couple of screws on the original wing mount that are stripped, so once i get them out, i will update with pics showing it installed. DHK Hobby screw heads are a bit soft, so if you overtighten them, they strip easy, and i constantly forget that.
 
@WoodiE I blame you for this one LOL. Not really, this came about because i can't seem to find a Truggy i really like. I havent done a build since i did my frankenstein DHK Hunter though. Since i already have the Wolf 2 buggy, but I'm not a fan of buggies, i decided to truggy it, sort of. I'm actually making a monster buggy out of it. I am going to keep the buggy body, but add MT wheels and tires from a Redcat Volcano, but to do that, the axle ends, hexes, and pins need to be replaced, because the Wolf 2 has 6MM instead of 4MM wheel nuts. Luckily, before anyone asks, swapping to the smaller axles is actually easy, and only takes a few parts. I am also adding rubber shielded bearings while it is apart. The parts needed are:
(2) 8135-707 hexes
(2) 8135-706 axle ends.
83831-103 Axle pins.
8135-704 Axle nuts (not necessarily needed, but i was out of my spares anyway).
Now I'm just waiting for the bearing kit to get here.

Ill post pics as its being done, and when it is finished, as well as pics of the new wing once its finally done.
 

Attachments

  • IMG_20210207_124336219.webp
    IMG_20210207_124336219.webp
    73 KB · Views: 95
  • IMG_20210207_124354915.webp
    IMG_20210207_124354915.webp
    84.9 KB · Views: 114
  • IMG_20210207_124558696.webp
    IMG_20210207_124558696.webp
    31.4 KB · Views: 108
  • IMG_20210207_124603301.webp
    IMG_20210207_124603301.webp
    53.5 KB · Views: 100
  • IMG_20210207_124614258.webp
    IMG_20210207_124614258.webp
    26.6 KB · Views: 105
  • IMG_20210207_124621424.webp
    IMG_20210207_124621424.webp
    27.5 KB · Views: 102
Thanks for sharing.
I was finally able to get this finished. Here are the before pics with the original axles, hexes, metal shielded bearings, and stock wing.
 

Attachments

  • IMG_20210217_214855862.webp
    IMG_20210217_214855862.webp
    83.5 KB · Views: 117
  • IMG_20210217_214902347.webp
    IMG_20210217_214902347.webp
    108.7 KB · Views: 101
  • IMG_20210217_214913978.webp
    IMG_20210217_214913978.webp
    130.3 KB · Views: 93
New axle ends, rubber shielded bearings, wheels and tires.
 

Attachments

  • IMG_20210217_223622448.webp
    IMG_20210217_223622448.webp
    57.6 KB · Views: 98
  • IMG_20210217_223634893.webp
    IMG_20210217_223634893.webp
    64.7 KB · Views: 105
  • IMG_20210217_230207657.webp
    IMG_20210217_230207657.webp
    98.8 KB · Views: 103
Almost finished. I say almost because i still need to drill out the center of the wheels, because they dont sit flush on the hexes.
 

Attachments

  • IMG_20210217_230322829.webp
    IMG_20210217_230322829.webp
    93.3 KB · Views: 146
  • IMG_20210217_230504057.webp
    IMG_20210217_230504057.webp
    97.5 KB · Views: 106
  • IMG_20210217_230511101.webp
    IMG_20210217_230511101.webp
    89.6 KB · Views: 101
  • IMG_20210217_232927266.webp
    IMG_20210217_232927266.webp
    104.9 KB · Views: 116
  • IMG_20210217_232937979.webp
    IMG_20210217_232937979.webp
    88.2 KB · Views: 145
  • IMG_20210217_232951814.webp
    IMG_20210217_232951814.webp
    97.8 KB · Views: 116
Back
Top