These instructions are intended for the experienced hobbyist so I will not go into detail on removing screws or assemblies.
That being said, first things first. Remove the transmission from your Traxxas Revo. Six screws hold the 2 halves together. Pay close attention to any shims and there locations. Ideally all the gear should stay on the shafts and on the rear half of the case.
You can refer to your Traxxas Revo Manual, because I am doing this How to: after the fact, I do not have any pictures of what it looks like with all the gears installed, at any rate lets continue with the install.
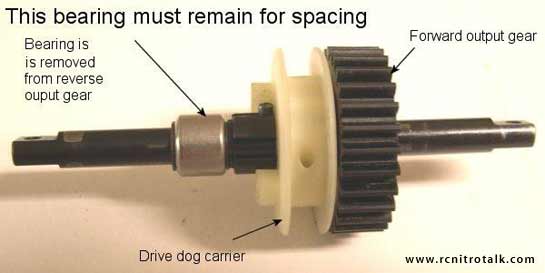
This first picture shows the ouput shaft completed. Notice the roll pin placement that we have installed. The only purpose of this roll pin is to pin the Drive Dog Carrier engaged into the Forward Output Gear. Also notice the bearing on the left. This gear was removed from the inside of the Reverse Output gear and must be replaced to act as a bushing/spacer.
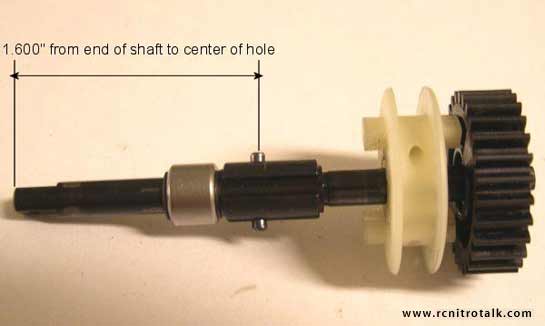
This next picture gives you the exact position of the roll pin to be installed. You will need a 3/32″ drill bit and a 3/32″ roll pin. From the front end of the shaft to the center of the hole is 1.600″. The shaft is hardened, but it is not too hard to drill. I do recommend a decent drill bit and a drill press for this part. When drilling the hole, be very careful as the drill bit gets close to cutting through the opposite side that you started. If you go too fast and it catches as it is breaking through it could break the tip of the drill bit off in the hole. One good thing about the shaft is it symmetrical so if you mess up the first time you have a second chance. One you have drilled the hole install the roll pin as shown
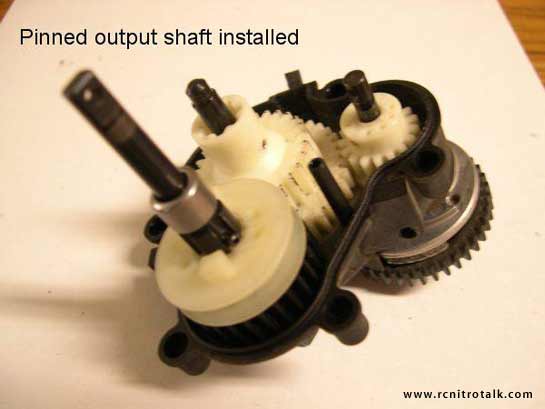
Once you have installed the roll pin, put the Drive Dog Carrier into place up against the roll pin, the slide the Forward Output Gear up to the Drive Dog Carrier. You can then replace this shaft back into place in the rear half of the tranny case as shown.
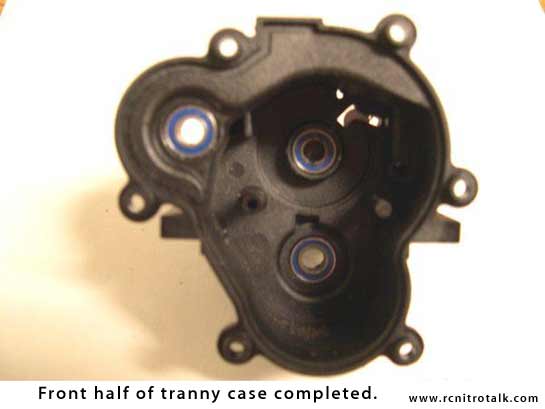
The next picture simply shows the front half of the case with the idler gear and Opti-Drive removed.
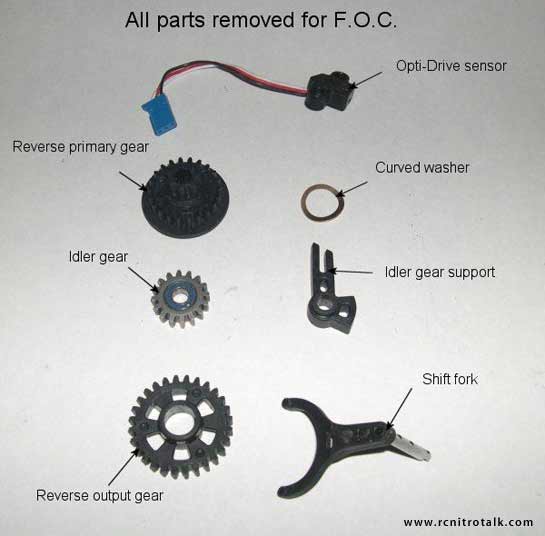
Before putting the Traxxas Revo tranny halves together, check the next picture. These are all the parts that get removed for this verson of the FOC.
Thats it. It is really straight forward and simple.
Be sure to put something over the hole on the outside front of the Traxxas Revo tranny case where the Opti-Drive unit was removed to keep dirt and debris out.
Thanks to RD Racing Products.