RicoBanderez
RCTalk Racer
- Thread starter
- #21

Follow along with the video below to see how to install our site as a web app on your home screen.
Note: This feature may not be available in some browsers.
Guys,Hi all,
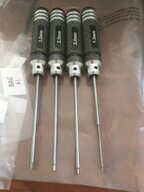
Servo saver mech done. My fingers are already sore from all the little fiddly bits and trying to tighten the nut under the spring.
The instructions state to tighten the nut all the way and then back off 5 1/2 turns but I don’t think I’d get it all the way by hand. As you see it in the picture it’s as much as I could do by hand
Guys,
The instructions state I should use some locktite on the servo saver nut but with all the research I’ve done it looks like it’s advantageous to have this servo saver actually being adjustable. So should I really use locktite on it?
Thanks
Hi,Sounds like the adjustment ring might be cross threaded, it should go on easier at first, maybe remove the spring and see if you can screw it on to check the thread?
Hi,
Thanks for the advice. Checked for a cross threaded nut and it wasn’t that. I used the contact cleaner and the nut didn’t go on any easier but did turn further on so I’m happy with where things are now. I expect it’ll change when I get running and setting up steering!
@marauder @Primarrma @Sledgehog @D3MON @WoodiE @Rolex @HPIguy @Lazy Bushman @cbaker65 @Billyboi1000
Hi folks,
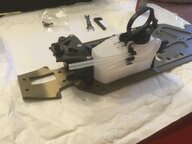
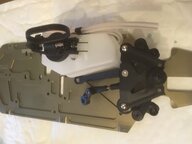
I’ve got a couple of days of progress in pics now up but I’ve got some leftover bits which I can’t identify .. if anyone has any ideas or feedback it’d be much appreciated.
Cheers all
Rich

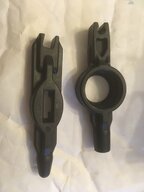
Only 1 of each of those plastic bits.If it is just those 2 pieces ,they maybe some type of plastic tool ,some kits give plastic tools to adjust the rod links!
LOL....Now if there is 4 sets of those ,then I would start to worry!.......
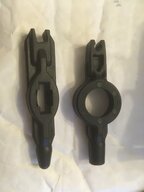
I'm thinking they are coolers for overheating servos. Oop, never mind. wrong thread.This is what’s left over ... anyone for any clues?
Hi Cbaker,Did you build those diffs ,an do they rotate smoothly with out any binding?...